setup
COMPONENTS
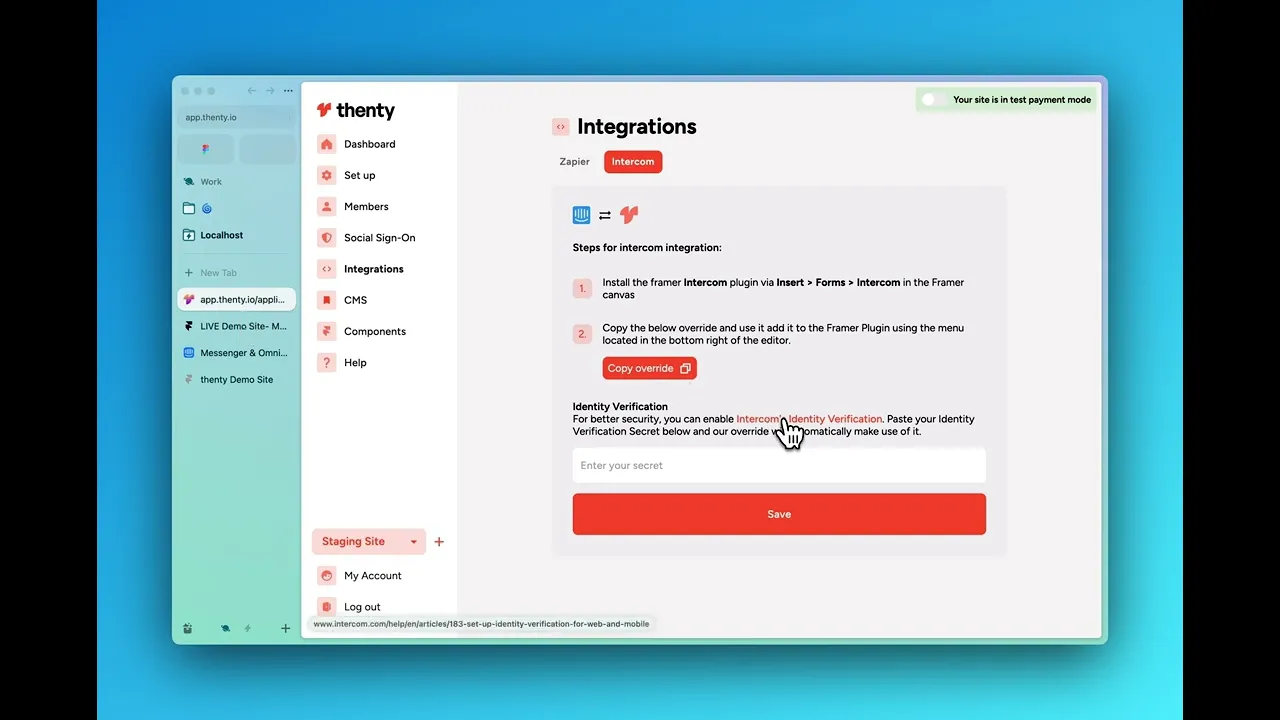
INTEGRATIONS
FAQ
Connect Intercom with Thenty in Framer
Grab Your Intercom App ID
In Intercom, copy the part of the URL after
/apps/and before/messenger.
Add the Intercom Widget in Framer
In Framer: Insert → Forms → Intercom
Paste your Intercom App ID into the widget settings
Apply the Thenty Override
In Thenty: Integrations → Intercom, copy the override from Step 2.
Copy: import { fetchUserData } from "./ThentyHelpers.tsx"; import { thentyAuth } from "https://cdn.thenty.io/beta/dev.thenty-sdk.min.js"; import { useEffect } from "react"; export const withIntercom=(Component)=>props=>{const{loggedIn,userData}=fetchUserData();useEffect(()=>{if(userData&&loggedIn&&window?.intercomSettings){window.intercomSettings={api_base:"https://api-iam.intercom.io/",name:userData?.name,email:userData?.email,user_id:userData?.id,created_at:userData?.created||Date.now()}}},[userData,loggedIn,window]);return};
In Framer: create a new override and paste the code.
Attach it to the Intercom widget and Publish.
Enable Identity Verification (Optional but Recommended)
In Thenty: under Intercom settings, click Identity Verification.
Copy the secret hash, paste it into the override, and save.
Now Intercom shows real user info (name, email, ID), and you’re protected from impersonators.