setup
COMPONENTS
INTEGRATIONS
FAQ
How to Add reCAPTCHA to Your Framer Forms
Insert the reCAPTCHA component
Open the FramerForms plugin in Framer
Add the reCAPTCHA Component
In the FramerForms input folder, scroll down to reCAPTCHA.
Drag and drop the reCAPTCHA component into your form.
Get a Site Key from Google
Go to the reCAPTCHA Website
Click "Get Started" to begin the setup process.
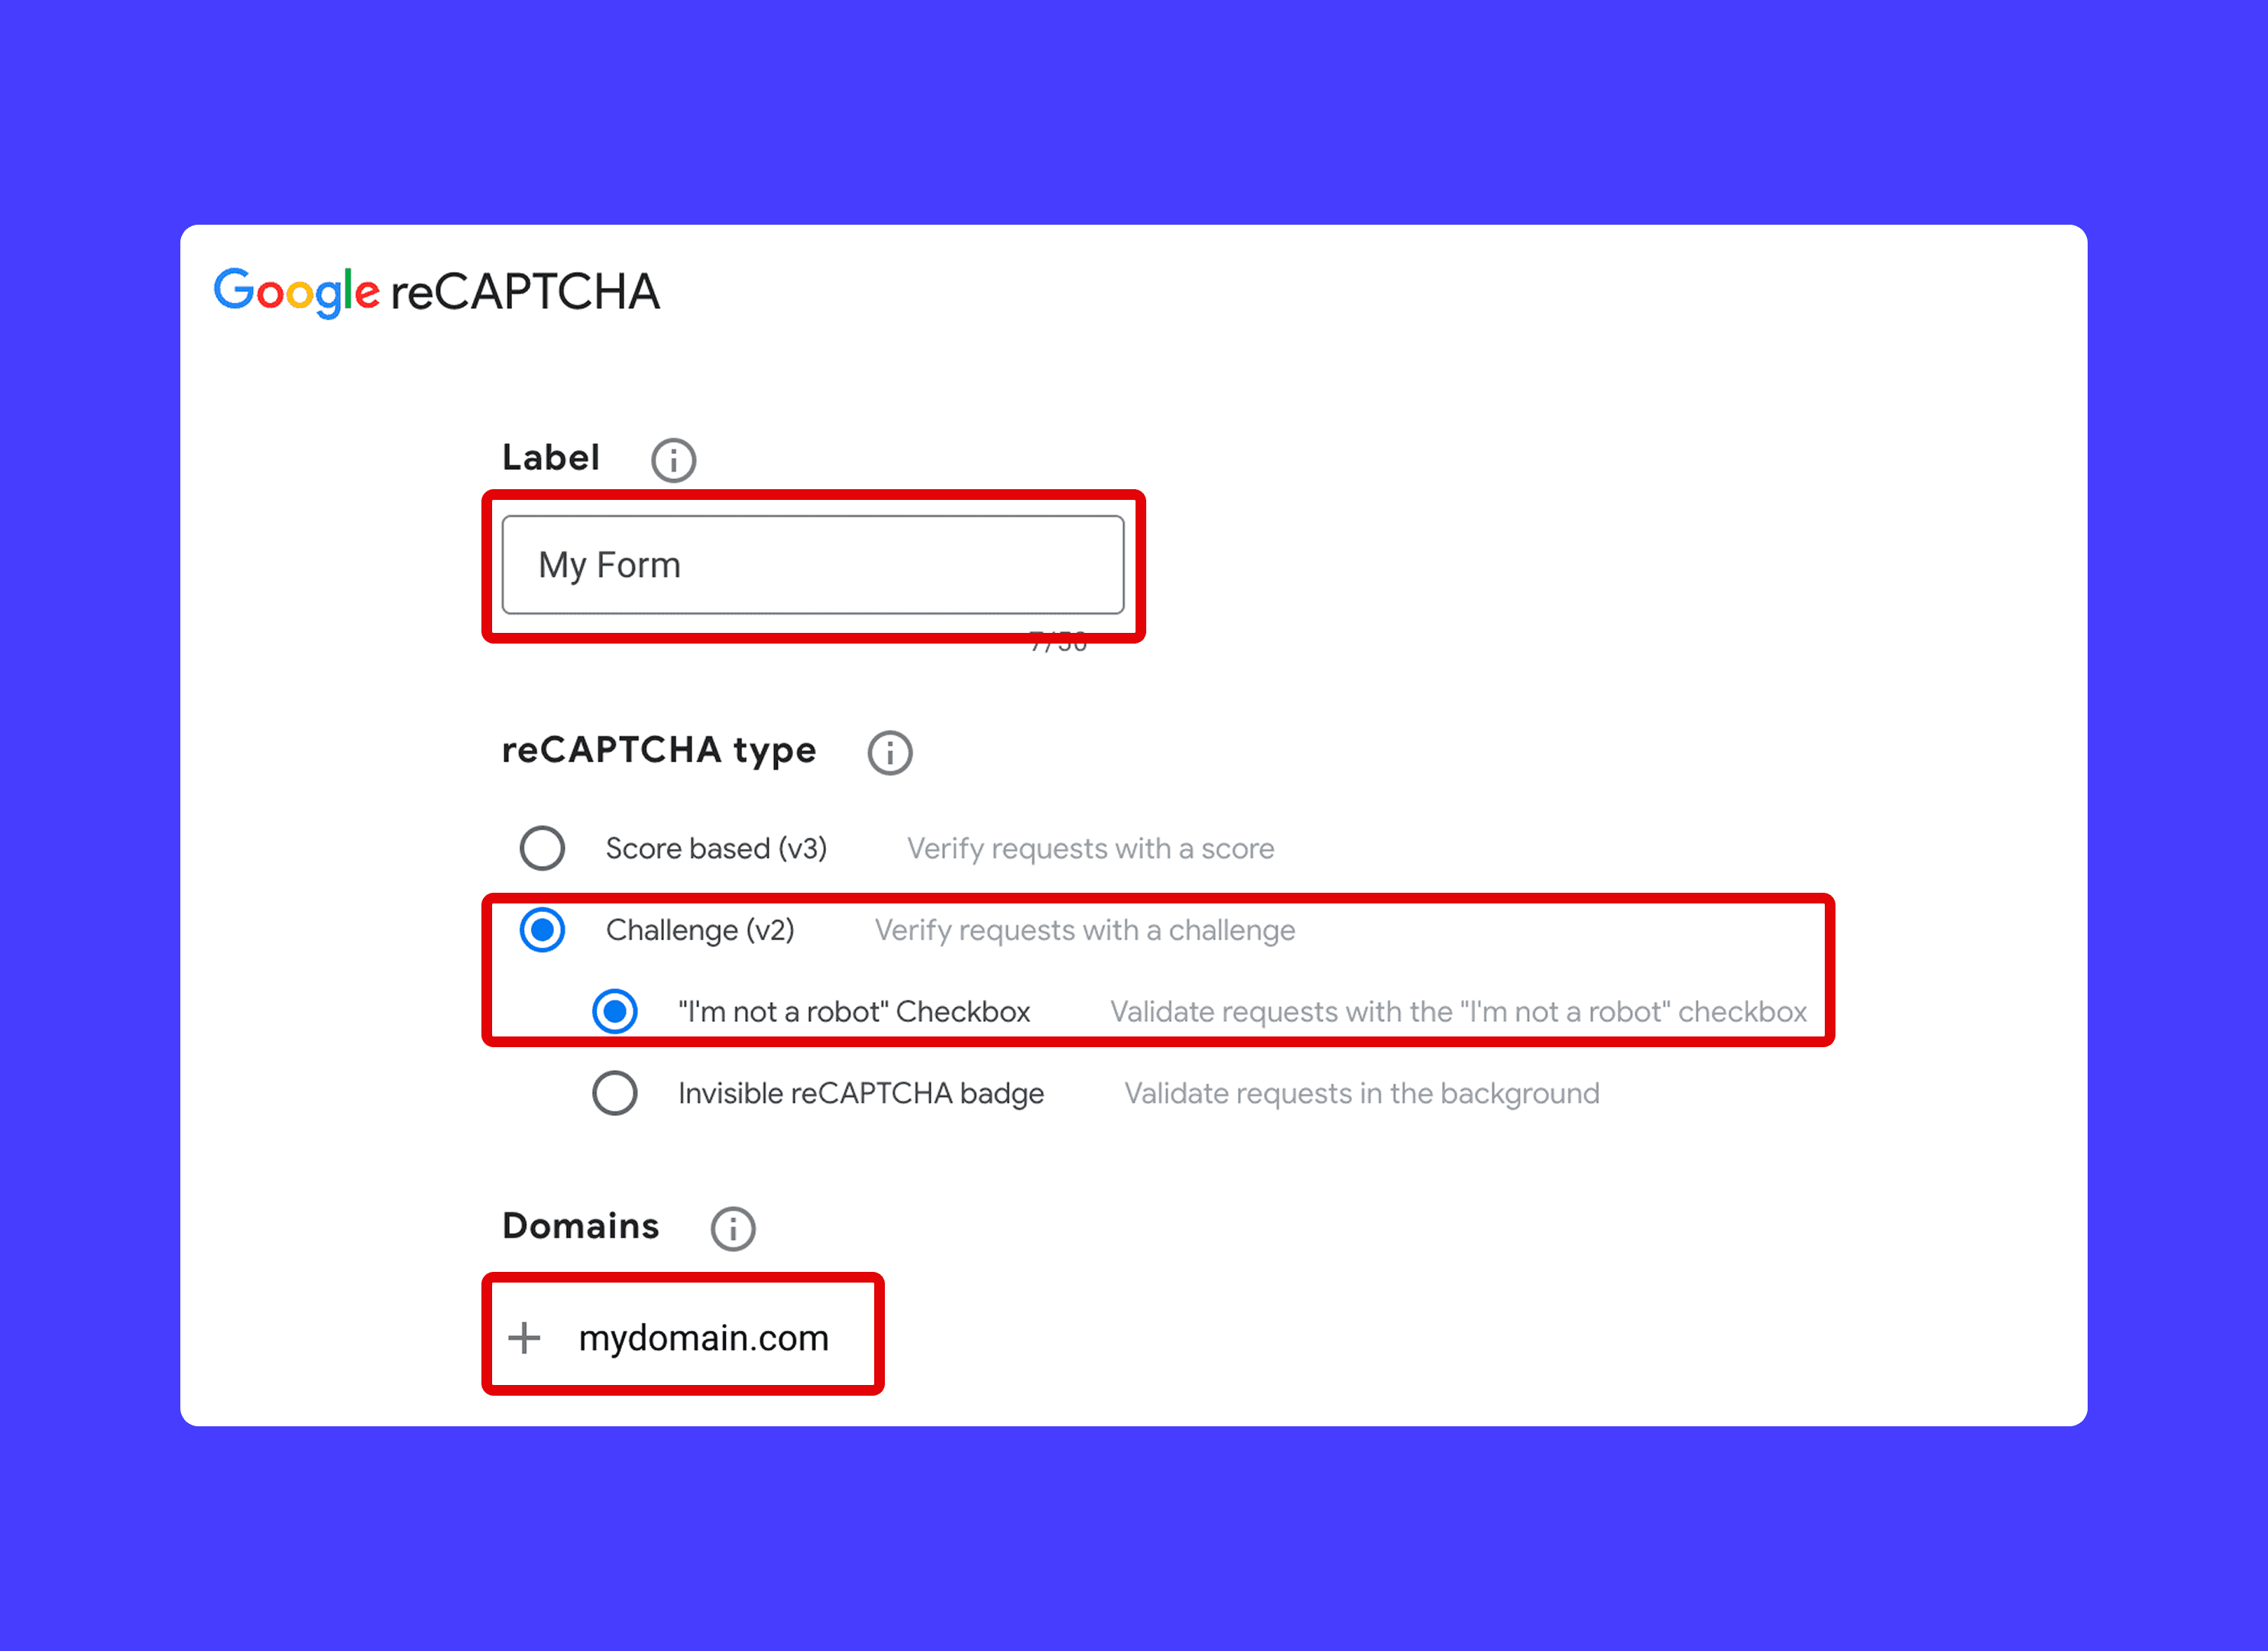
Set Up Your reCAPTCHA
Label Your reCAPTCHA: You can name this anything, such as “My Form”.
Select reCAPTCHA Type: Choose reCAPTCHA v2 (Important!) and select the “I’m not a robot” checkbox option.
FramerForms reCAPTCHA only currently supports v2.
Add Your Domain
Copy your Framer domain (found in the Framer project settings).
Paste the domain into the domain field but remove the https:// and backslashes to ensure proper authentication.
Submit the Form
Click Submit and you will be provided with a Site Key.
Paste the Site Key into Framer
Copy the Site Key
Copy the generated Site Key from Google.
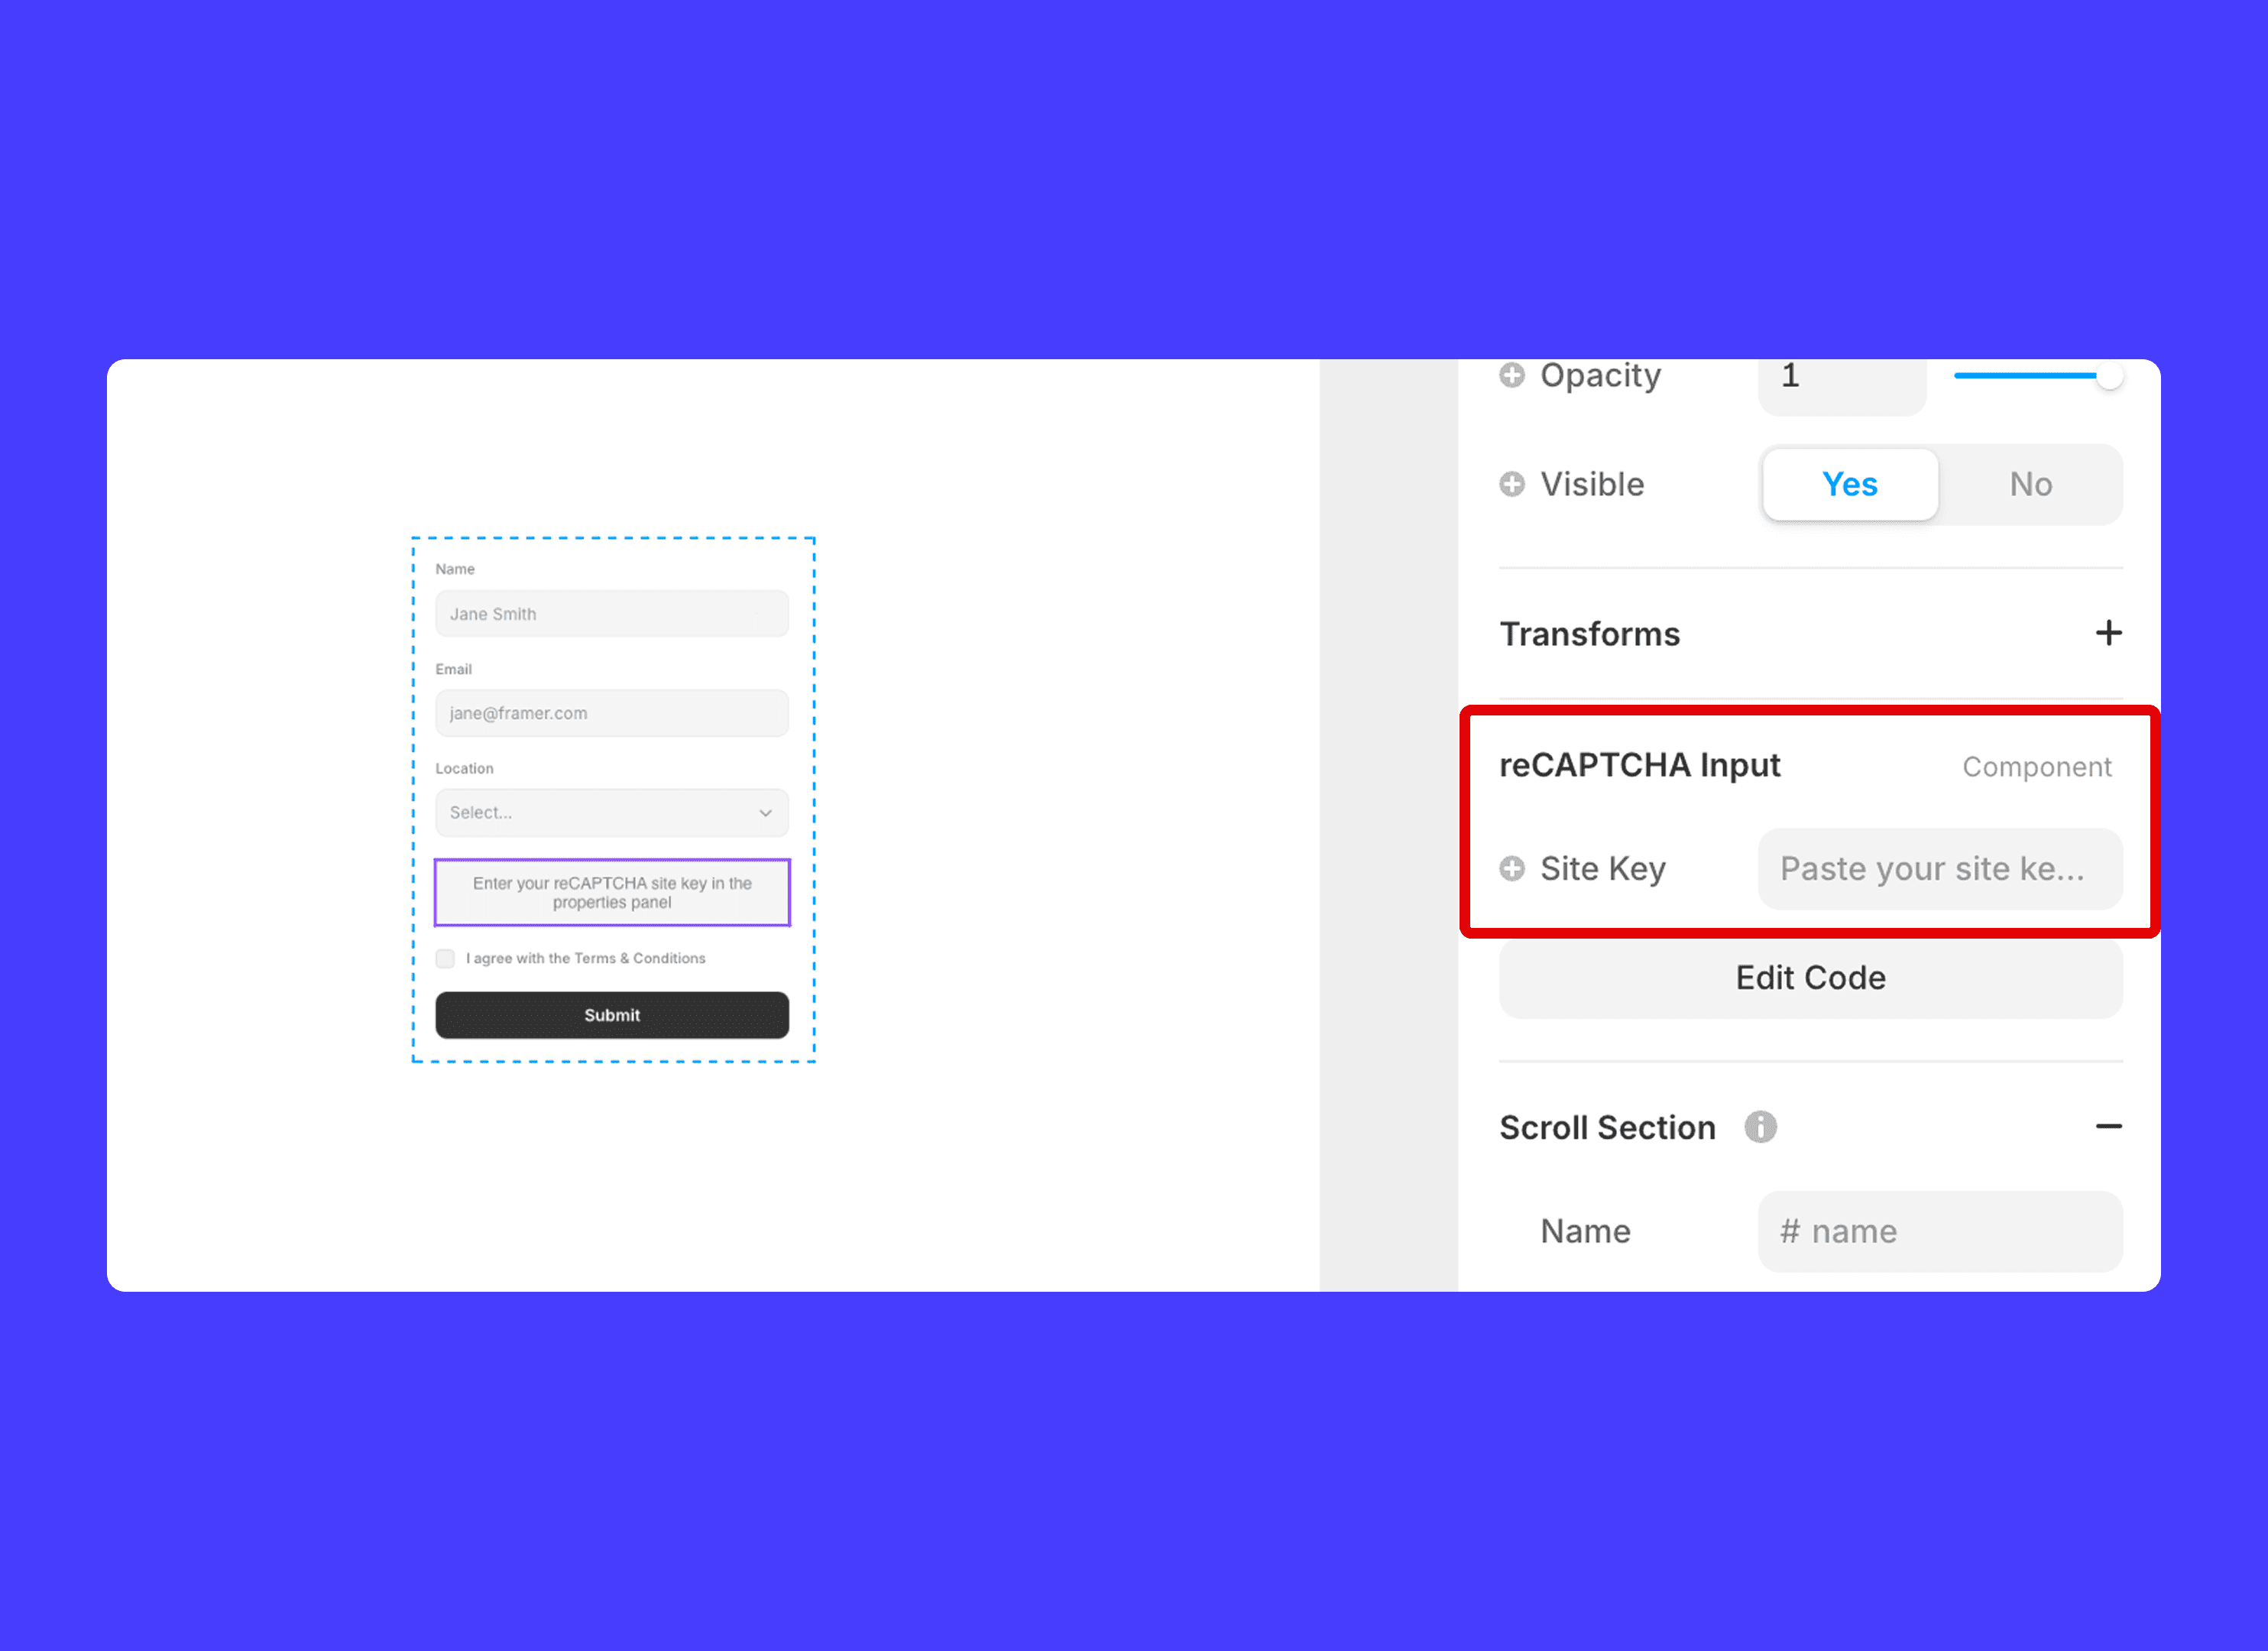
Paste the Site Key into Framer
Go back to your Framer project.
In the reCAPTCHA component, paste the Site Key into the provided field.
💡 Note: Since reCAPTCHA works only on your published site, you will need to publish your website for reCAPTCHA to work.
Publish Your Website
Publish Your Website
Since reCAPTCHA works only on your published site (authenticated by your domain), you will need to publish your website for the changes to take effect.
Preview the reCAPTCHA
You’ll notice that without completing the reCAPTCHA, the form won’t submit.
When you complete the “I’m not a robot” checkbox, the form will successfully submit.
Enjoy Bot-Free Form Submissions!
reCAPTCHA Component Design Limitations: The appearance, design and behavior of the reCAPTCHA checkbox are controlled by Google and cannot be changed within FramerForms.
💡 Note: The reCAPTCHA Challenge Code comes through with all submissions, and cannot be removed. This is to ensure you are able to validate all submissions manually if required.
RELATED DOCUMENTATION