setup
COMPONENTS
INTEGRATIONS
FAQ
How to Connect Framer with Shopify: Full Setup Guide for E-commerce
Creating your store in Framer
Now that you have your store connected to Framer, it is time to sync your Shopify store, set up product displays, and configure essential e-commerce components.
Sync Shopify Details
Go to the Framer CMS, then back to Plugins to open the Frameship plugin.
Create a new collection:
Name it (e.g., “Frameship”).
Once connected, click Sync to pull all your Shopify products into Framer. Any updates in Shopify (like new products) can be synced by pressing Sync in the CMS.
💡 Important Your store data or any changes made to the product details will not be synced automatically, besides stock count.
Create your Product Pages
In Framer, go to your canvas and create a new page.
Link this new page to the Framer CMS, creating a CMS detail page for your store collection.
Start designing your homepage:
Add components from your collection or start with pre-built sections for ease.
Customize as desired.
To display product information:
Select any item (e.g., a product title), then use the content settings to link it to the relevant CMS data, such as the product title, price, or inventory level.
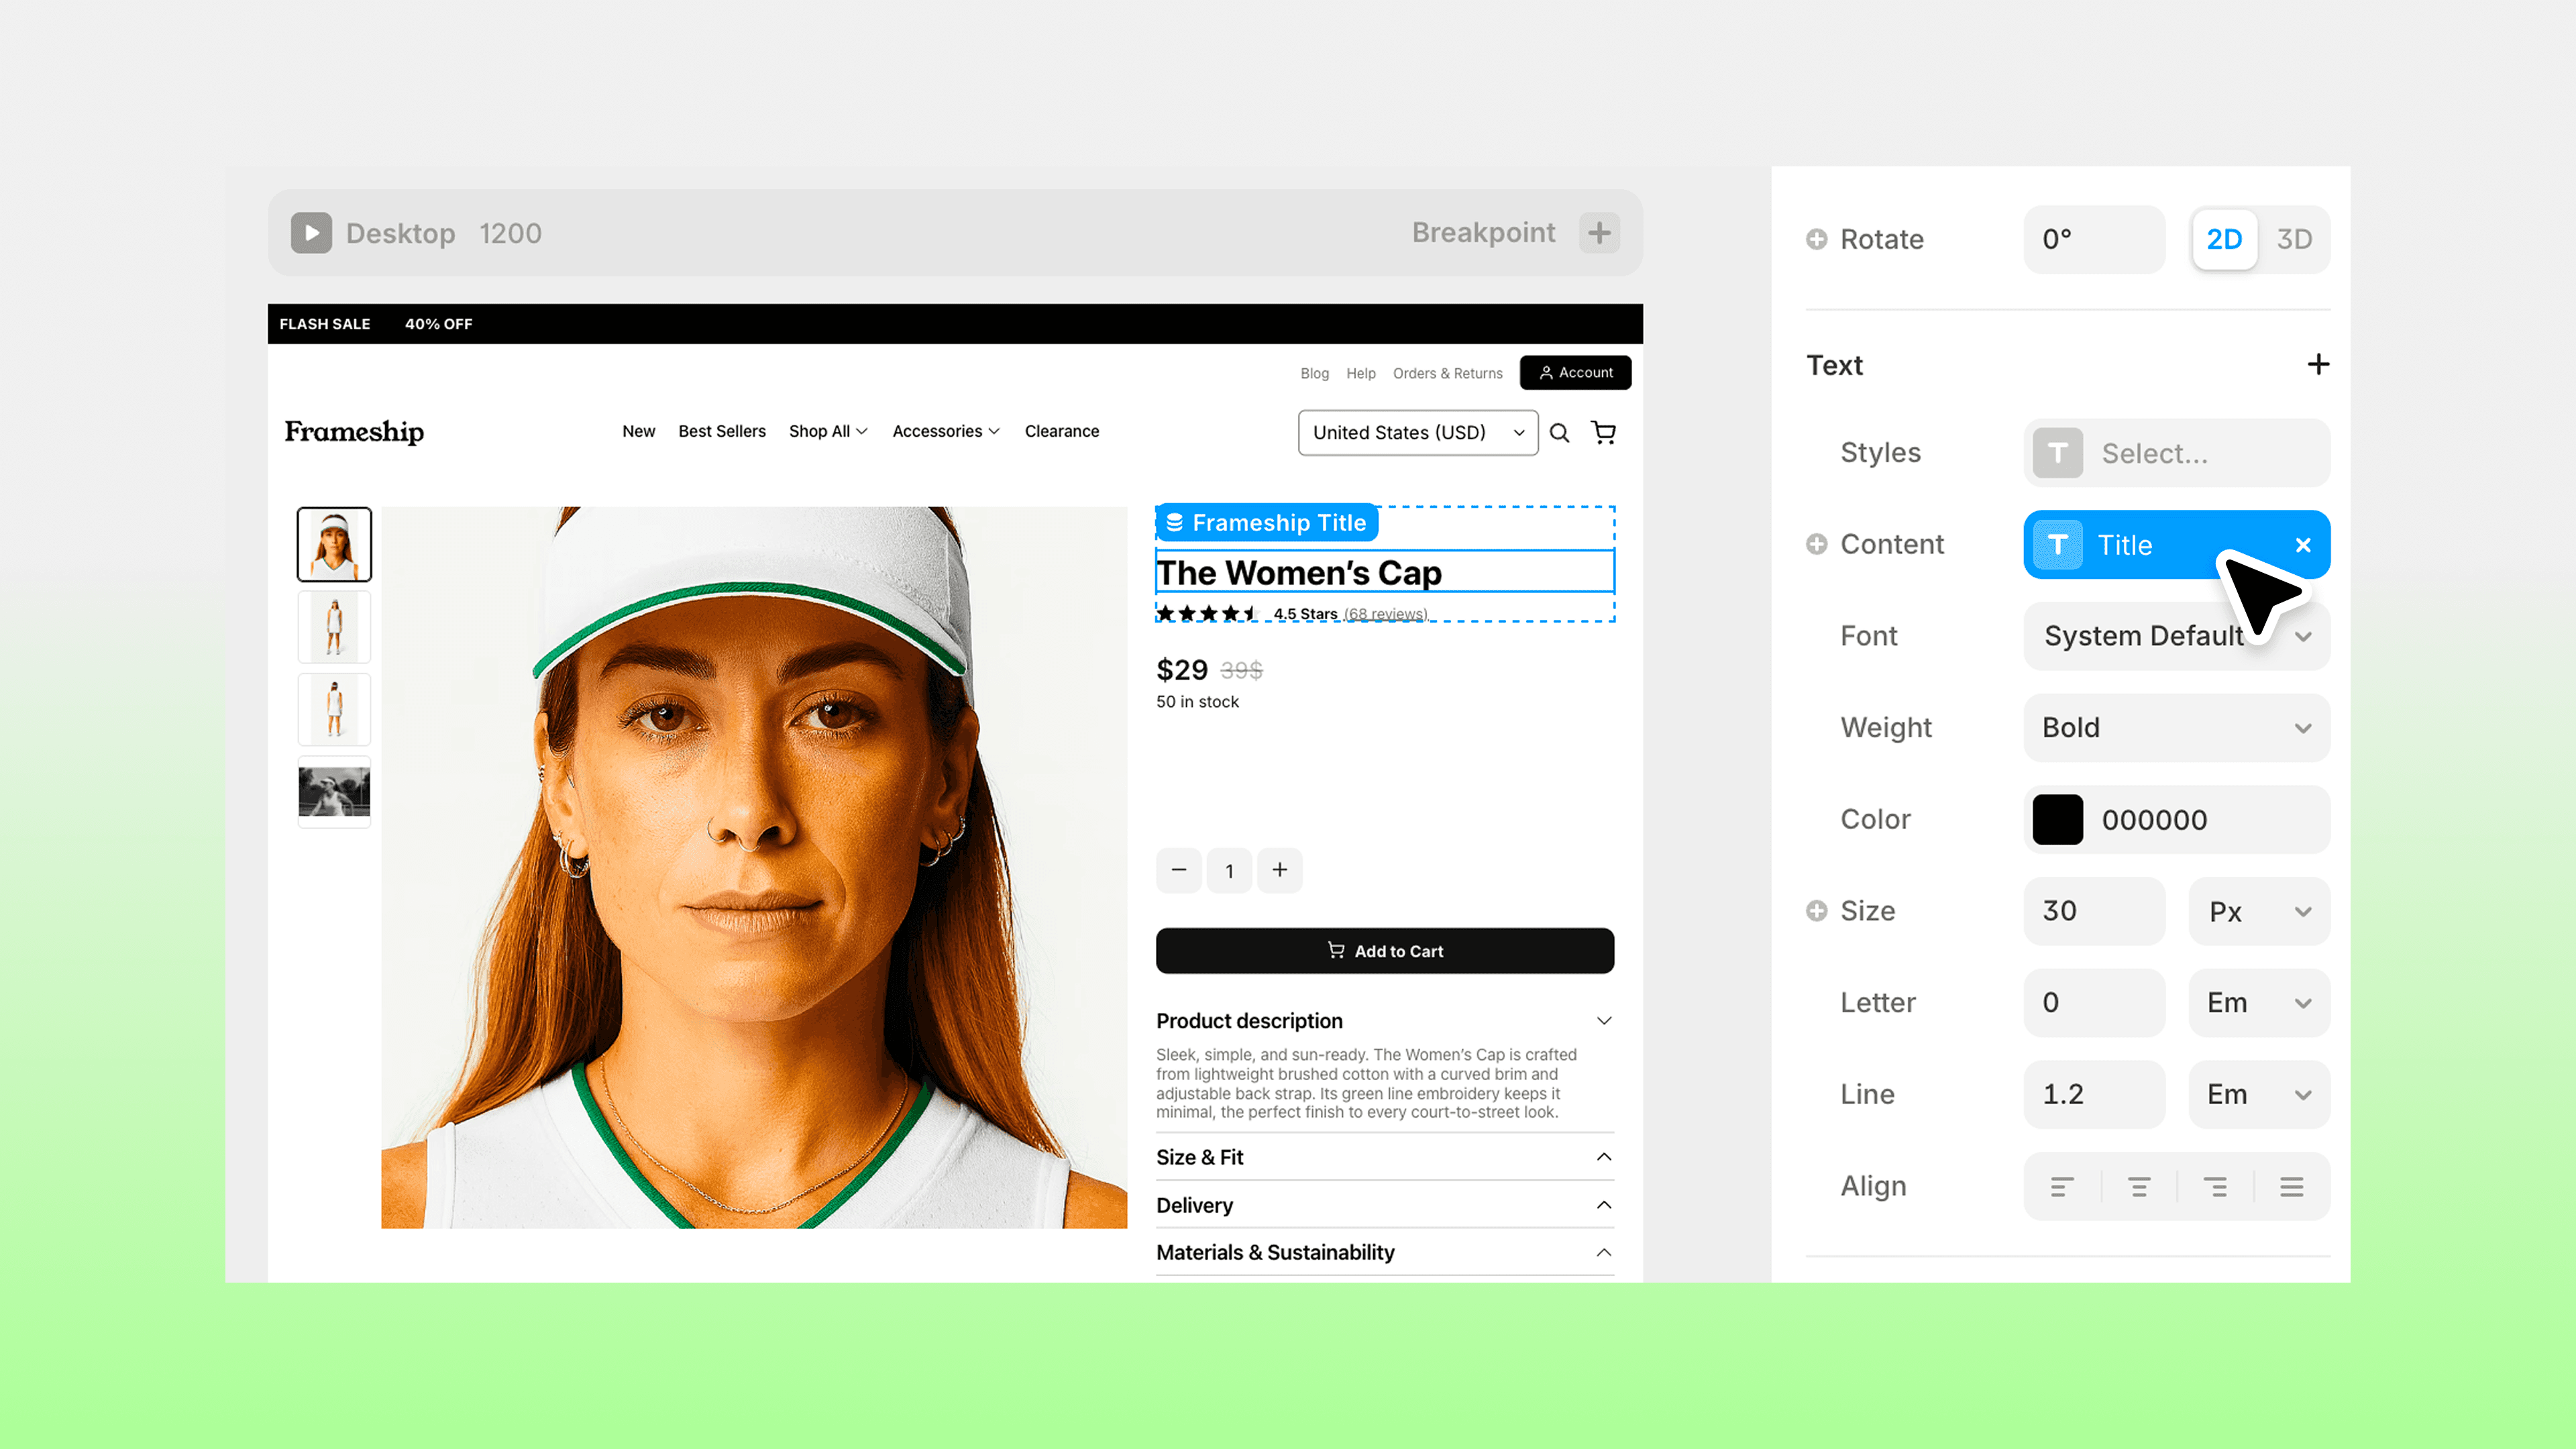
All products must live on a CMS detail page in order for all components and cart functionality to work as expected.
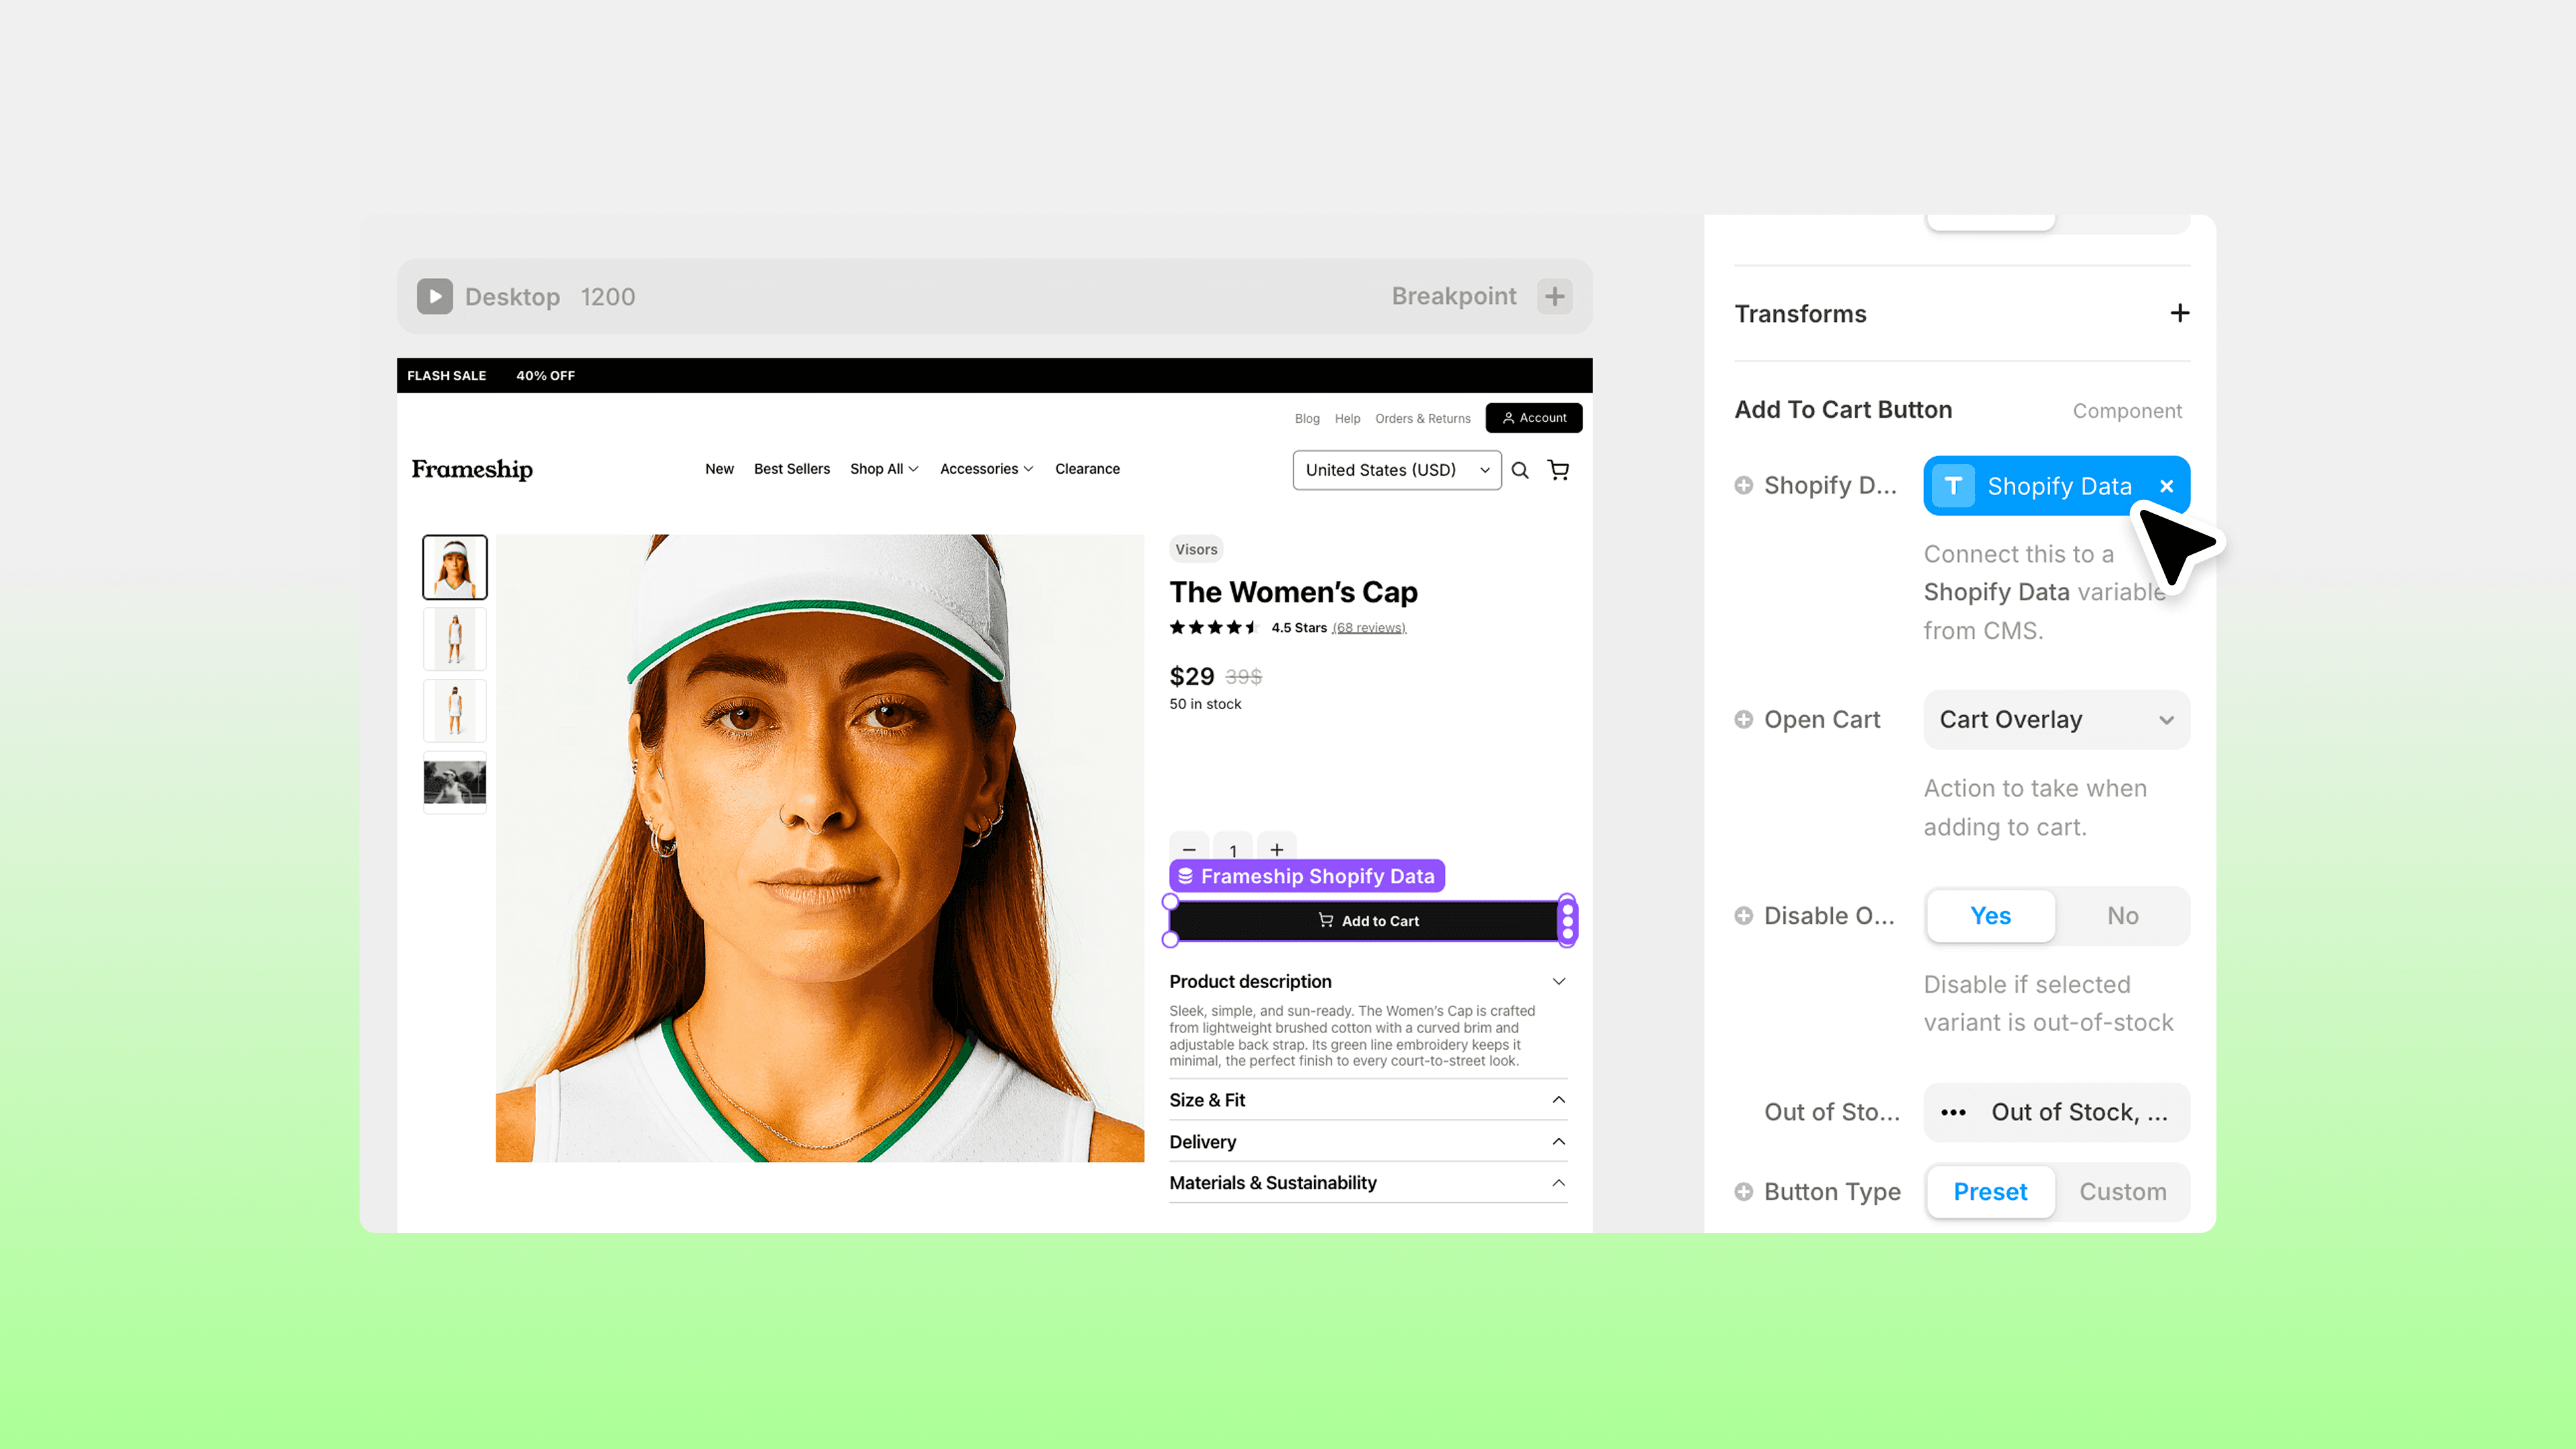
Product and Cart Details
Components:
Link components like price, inventory, and checkout buttons to your Shopify data to display live product information.
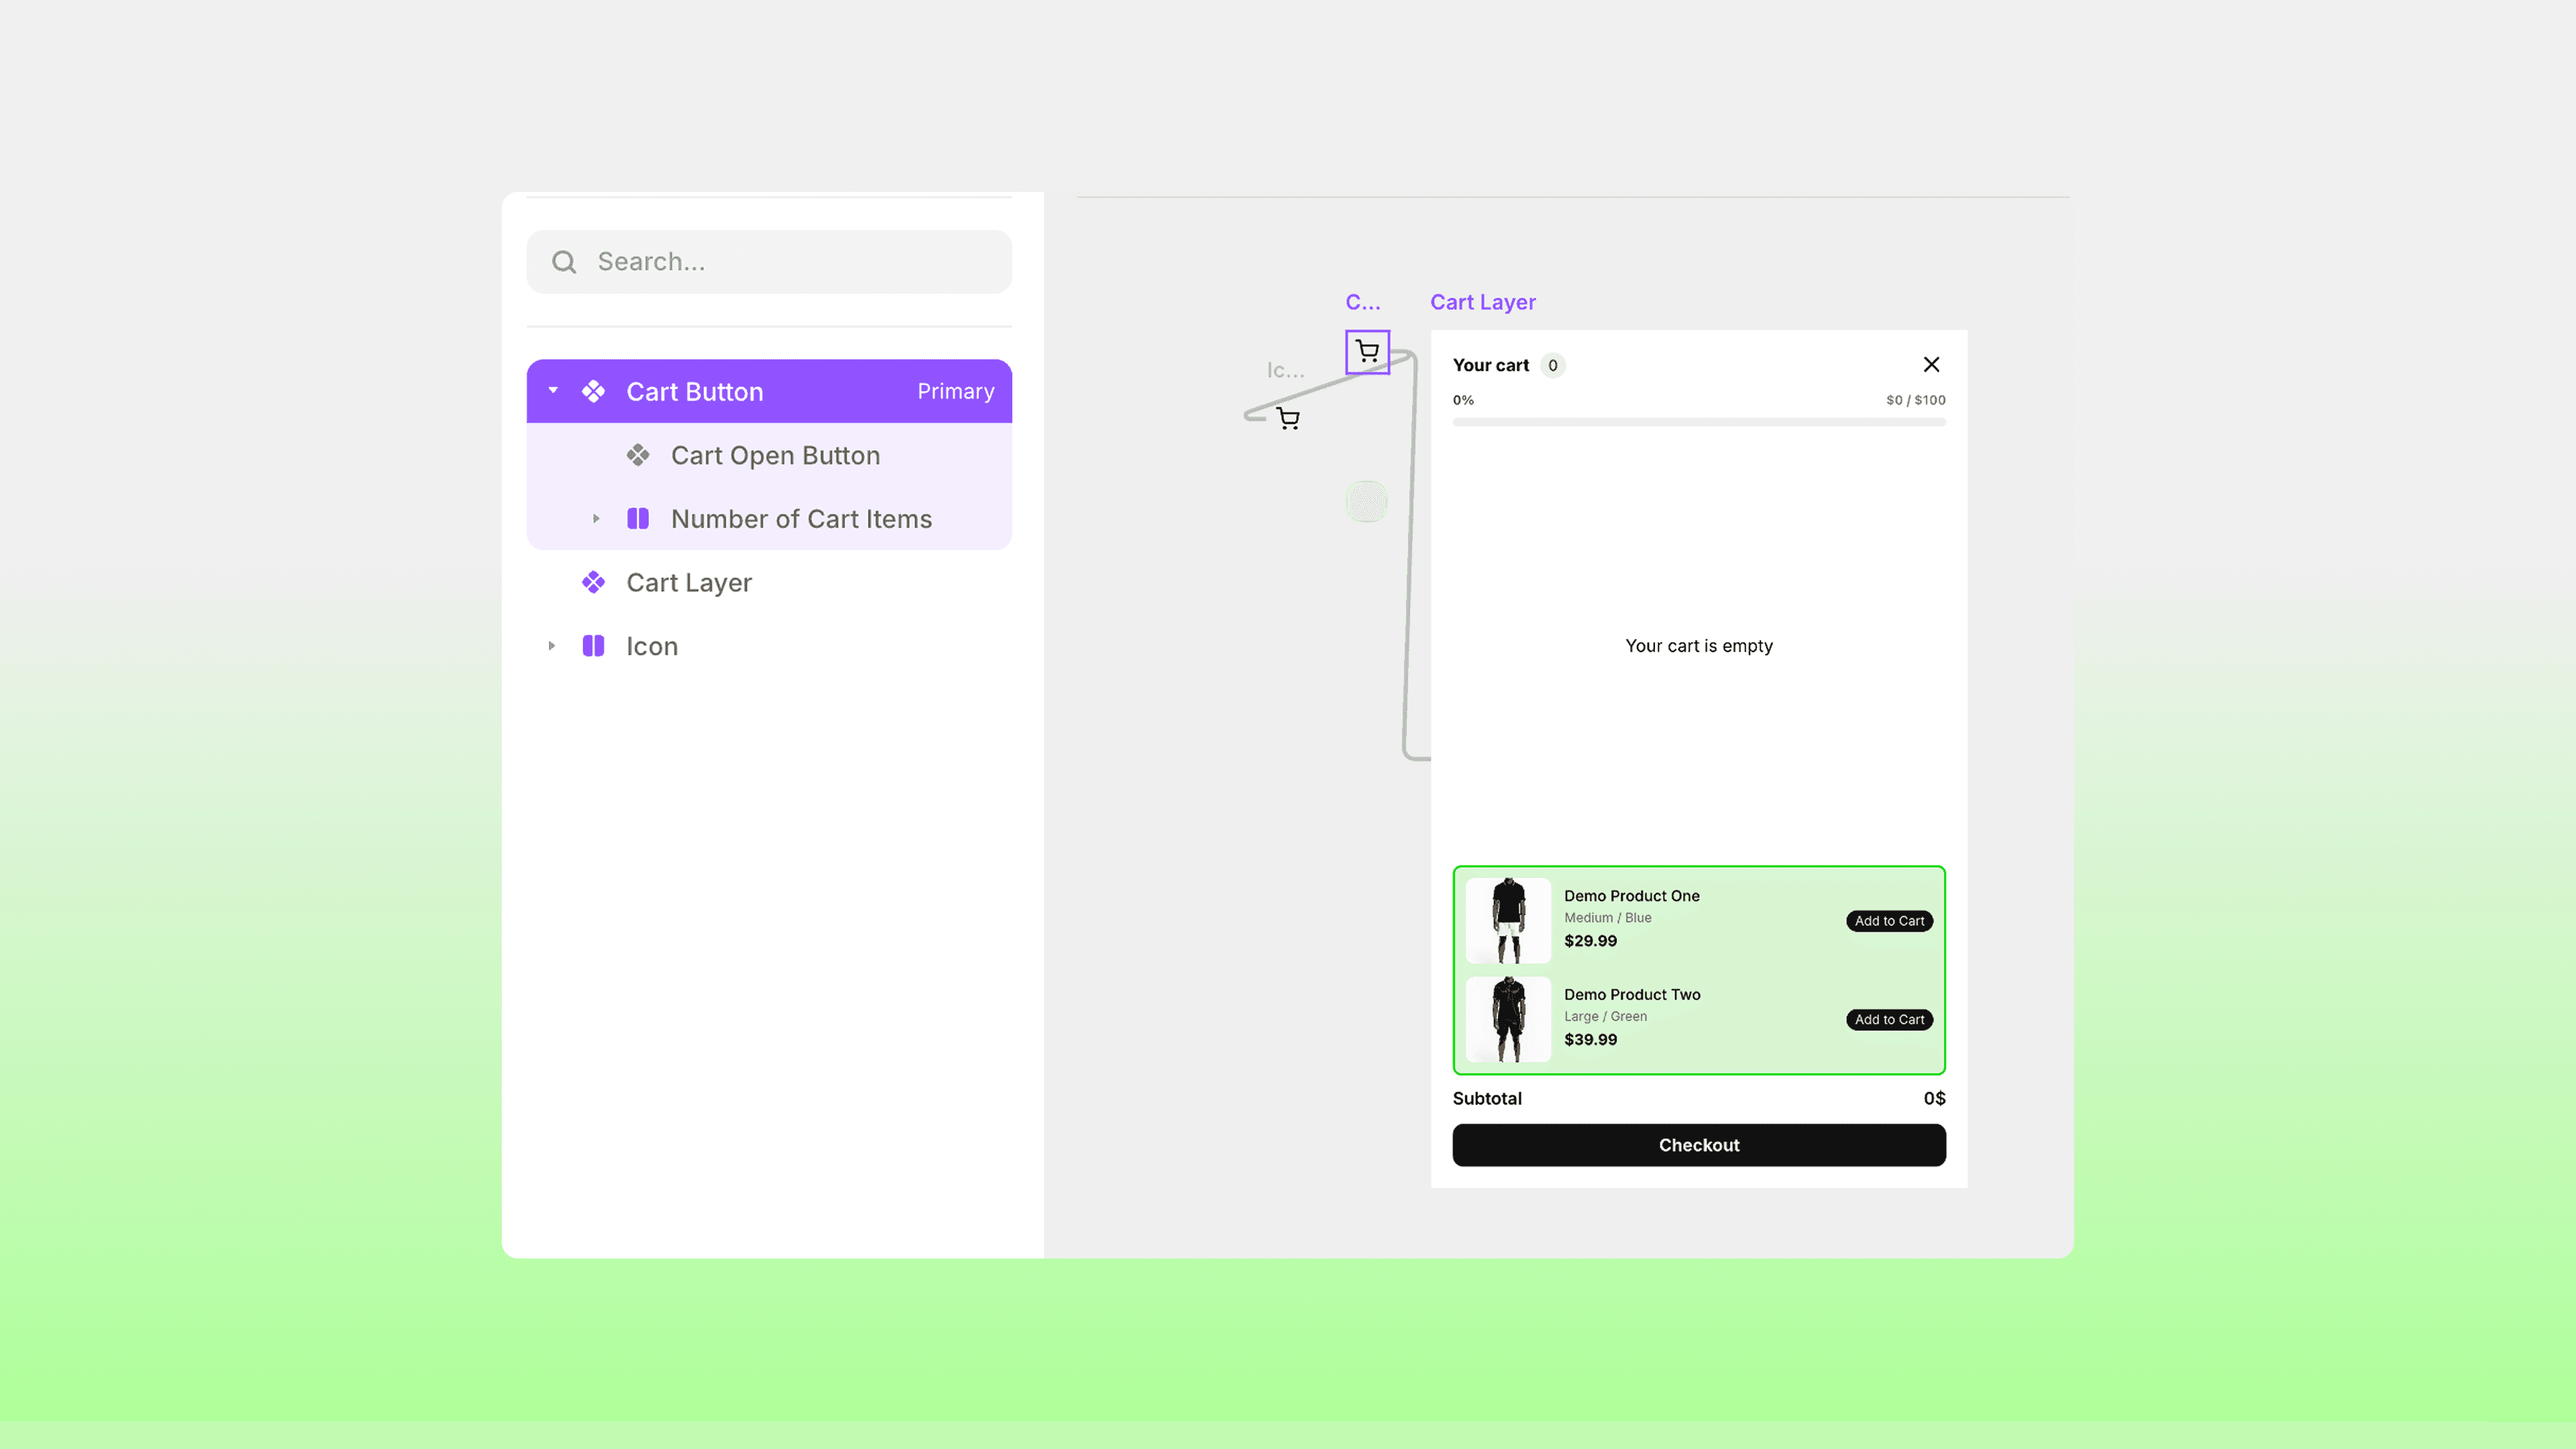
Cart Setup:
Add the Cart Component to your project:
Open Frameship, click on Components, then Cart and insert the Cart component to your page.
Customize it to suit your design needs within each component by double clicking and selecting ‘Unlink and Replace All’.
Test and Publish
Preview and Test:
Preview your site and test the functionality of the add-to-cart and checkout buttons.
Publish:
Once satisfied, publish your website.
Now, users can view products, add items to their cart, and complete their checkout directly on your site.
Additional Customizations
You can enhance your store with various features:
Variants, and Product Lists.
Image Gallery or other Components such as Multi-Currency or Subscriptions.
And that's it! You’re now set to build and launch a fully functional e-commerce website with Frameship and Framer.
If your Shopify store isn’t connecting, please check the following:
Check that you have set up the headless app in Shopify correctly.
Ensure you’ve enabled the required API scopes and copied the Storefront API Access Token accurately into Frameship.
Ensure your Shopify URL is in the correct format and ends in 'myshopify.com'.
If you are trying this through the CMS side, open the settings within the canvas side instead. Achieve this by going to your canvas page, open the plugin search at the bottom and open Frameship through there.
These setup points are essential for a smooth connection.
If you have purchased a template from our marketplace:
And need to disconnect the placeholder store, or your Shopify details have changed and you need to change your Shopify store settings, follow these steps:
Open the plugin
Go to Settings in the bottom left.
Hit Disconnect Shopify Store.
You can now enter your new details from Shopify!
Make sure you resync your CMS as well, so all information is up to date.