setup
COMPONENTS
INTEGRATIONS
FAQ
How to Add a Redirect from Shopify Checkout to Framer
On this page:
Changing your domain while you are building.
Adding a redirect from your Shopify checkout back to your Framer page.
Custom domains for your Shopify store/checkout
Changing your Framer domain while building
If you have connected a custom domain after building, you need to make sure your license is attached to your new domain, not the original staging domain.
You can check this at any time from within the plugin settings, under 'Production URL'.
If the Production URL is different to your custom domain, the banner will appear as it is recognising a different website.
To reset this, disconnect both the license and the Shopify connection, then reconnect both.
Adding a Redirect from your Shopify Checkout
Natively, when users want to navigate back from the Shopify checkout back to the store, the logo in the checkout will redirect to the Shopify front-end. Follow the steps below to change this to be your Framer front-end instead:
In your left sidebar in Shopify Admin dashboard, click on "Online Store" → "Themes"
On your current theme, click on the 3 dots button to open the dropdown menu.
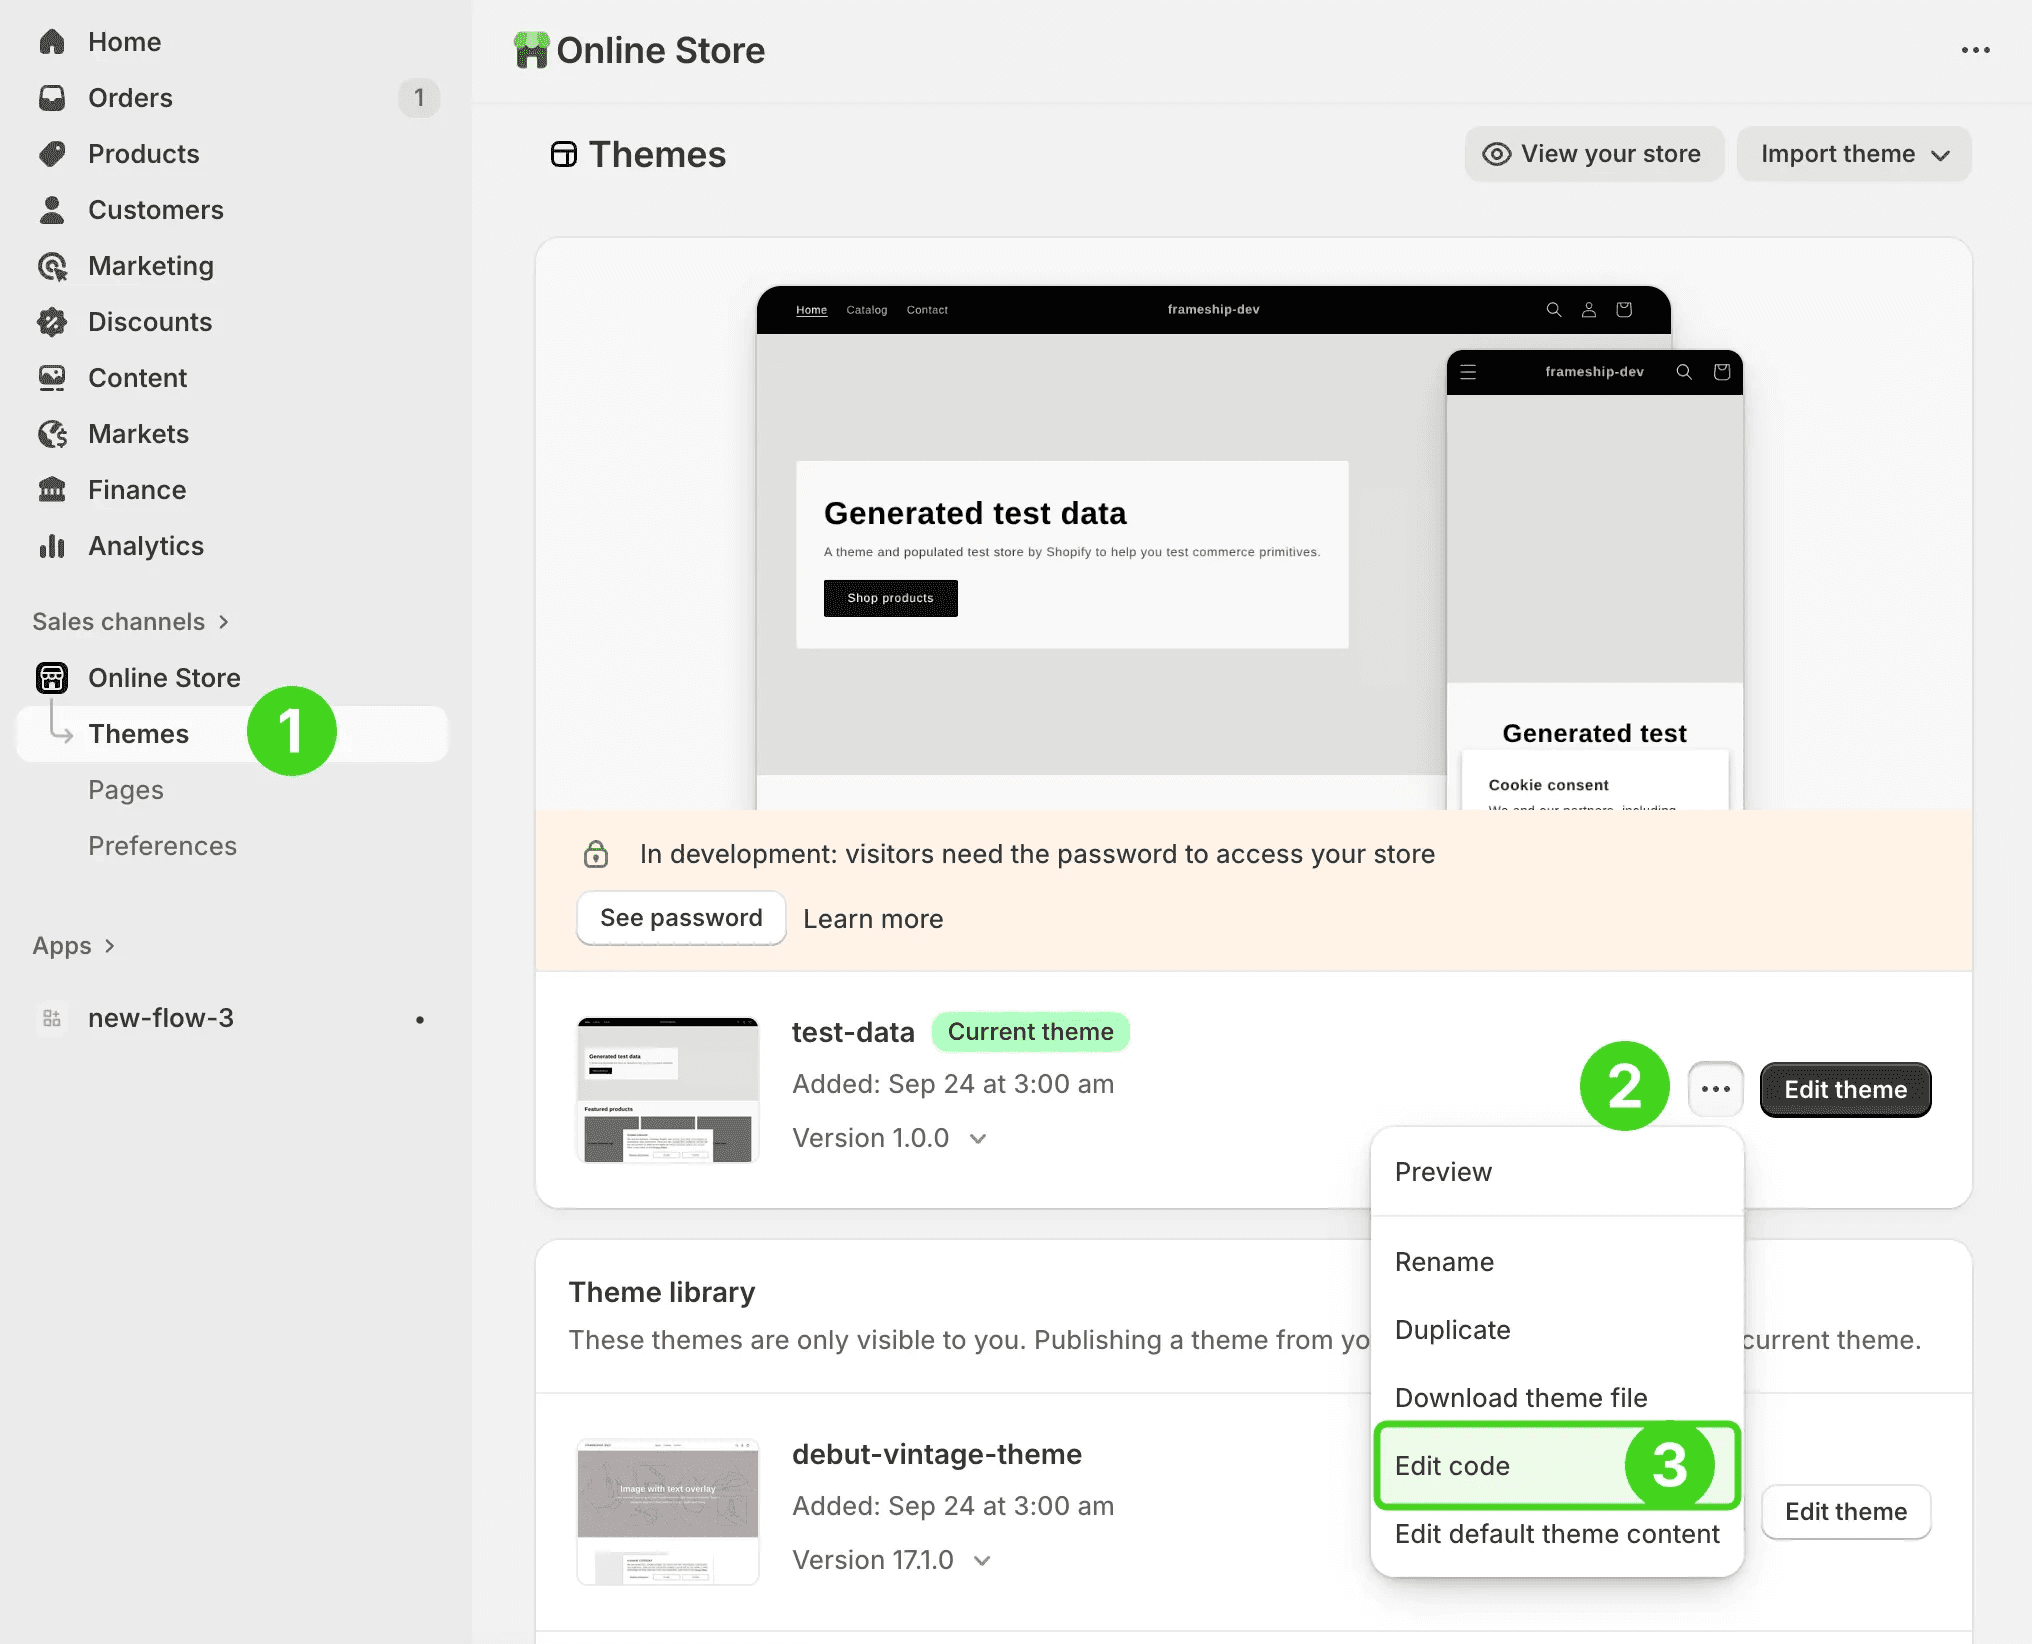
Click "Edit Code" button
In left sidebar, click on “layout” folder and open the “theme.liquid” file
Locate the end of head tag
Press CMD + F (CTRL + F) to open search bar and search
Paste this code snippet above the tag
Replace Shopify domain URL and Framer domain URL and save the file.
Custom domain in your Shopify checkout
As they are two separate sites, your Framer storefront and your Shopify checkout page cannot share the same domain.
Your main domain should be assigned to your Framer site, while your Shopify checkout can have a subdomain with the same branding for consistency.
This requires setting up a subdomain in your domain host settings and applying it to your Shopify domain settings.
RELATED DOCUMENTATION