
setup
COMPONENTS
INTEGRATIONS
FAQ
How to Display Shopify Product Variants in Framer
You must have your variants set up correctly in Shopify first to work your Framer project.
Setting up Variants in Shopify
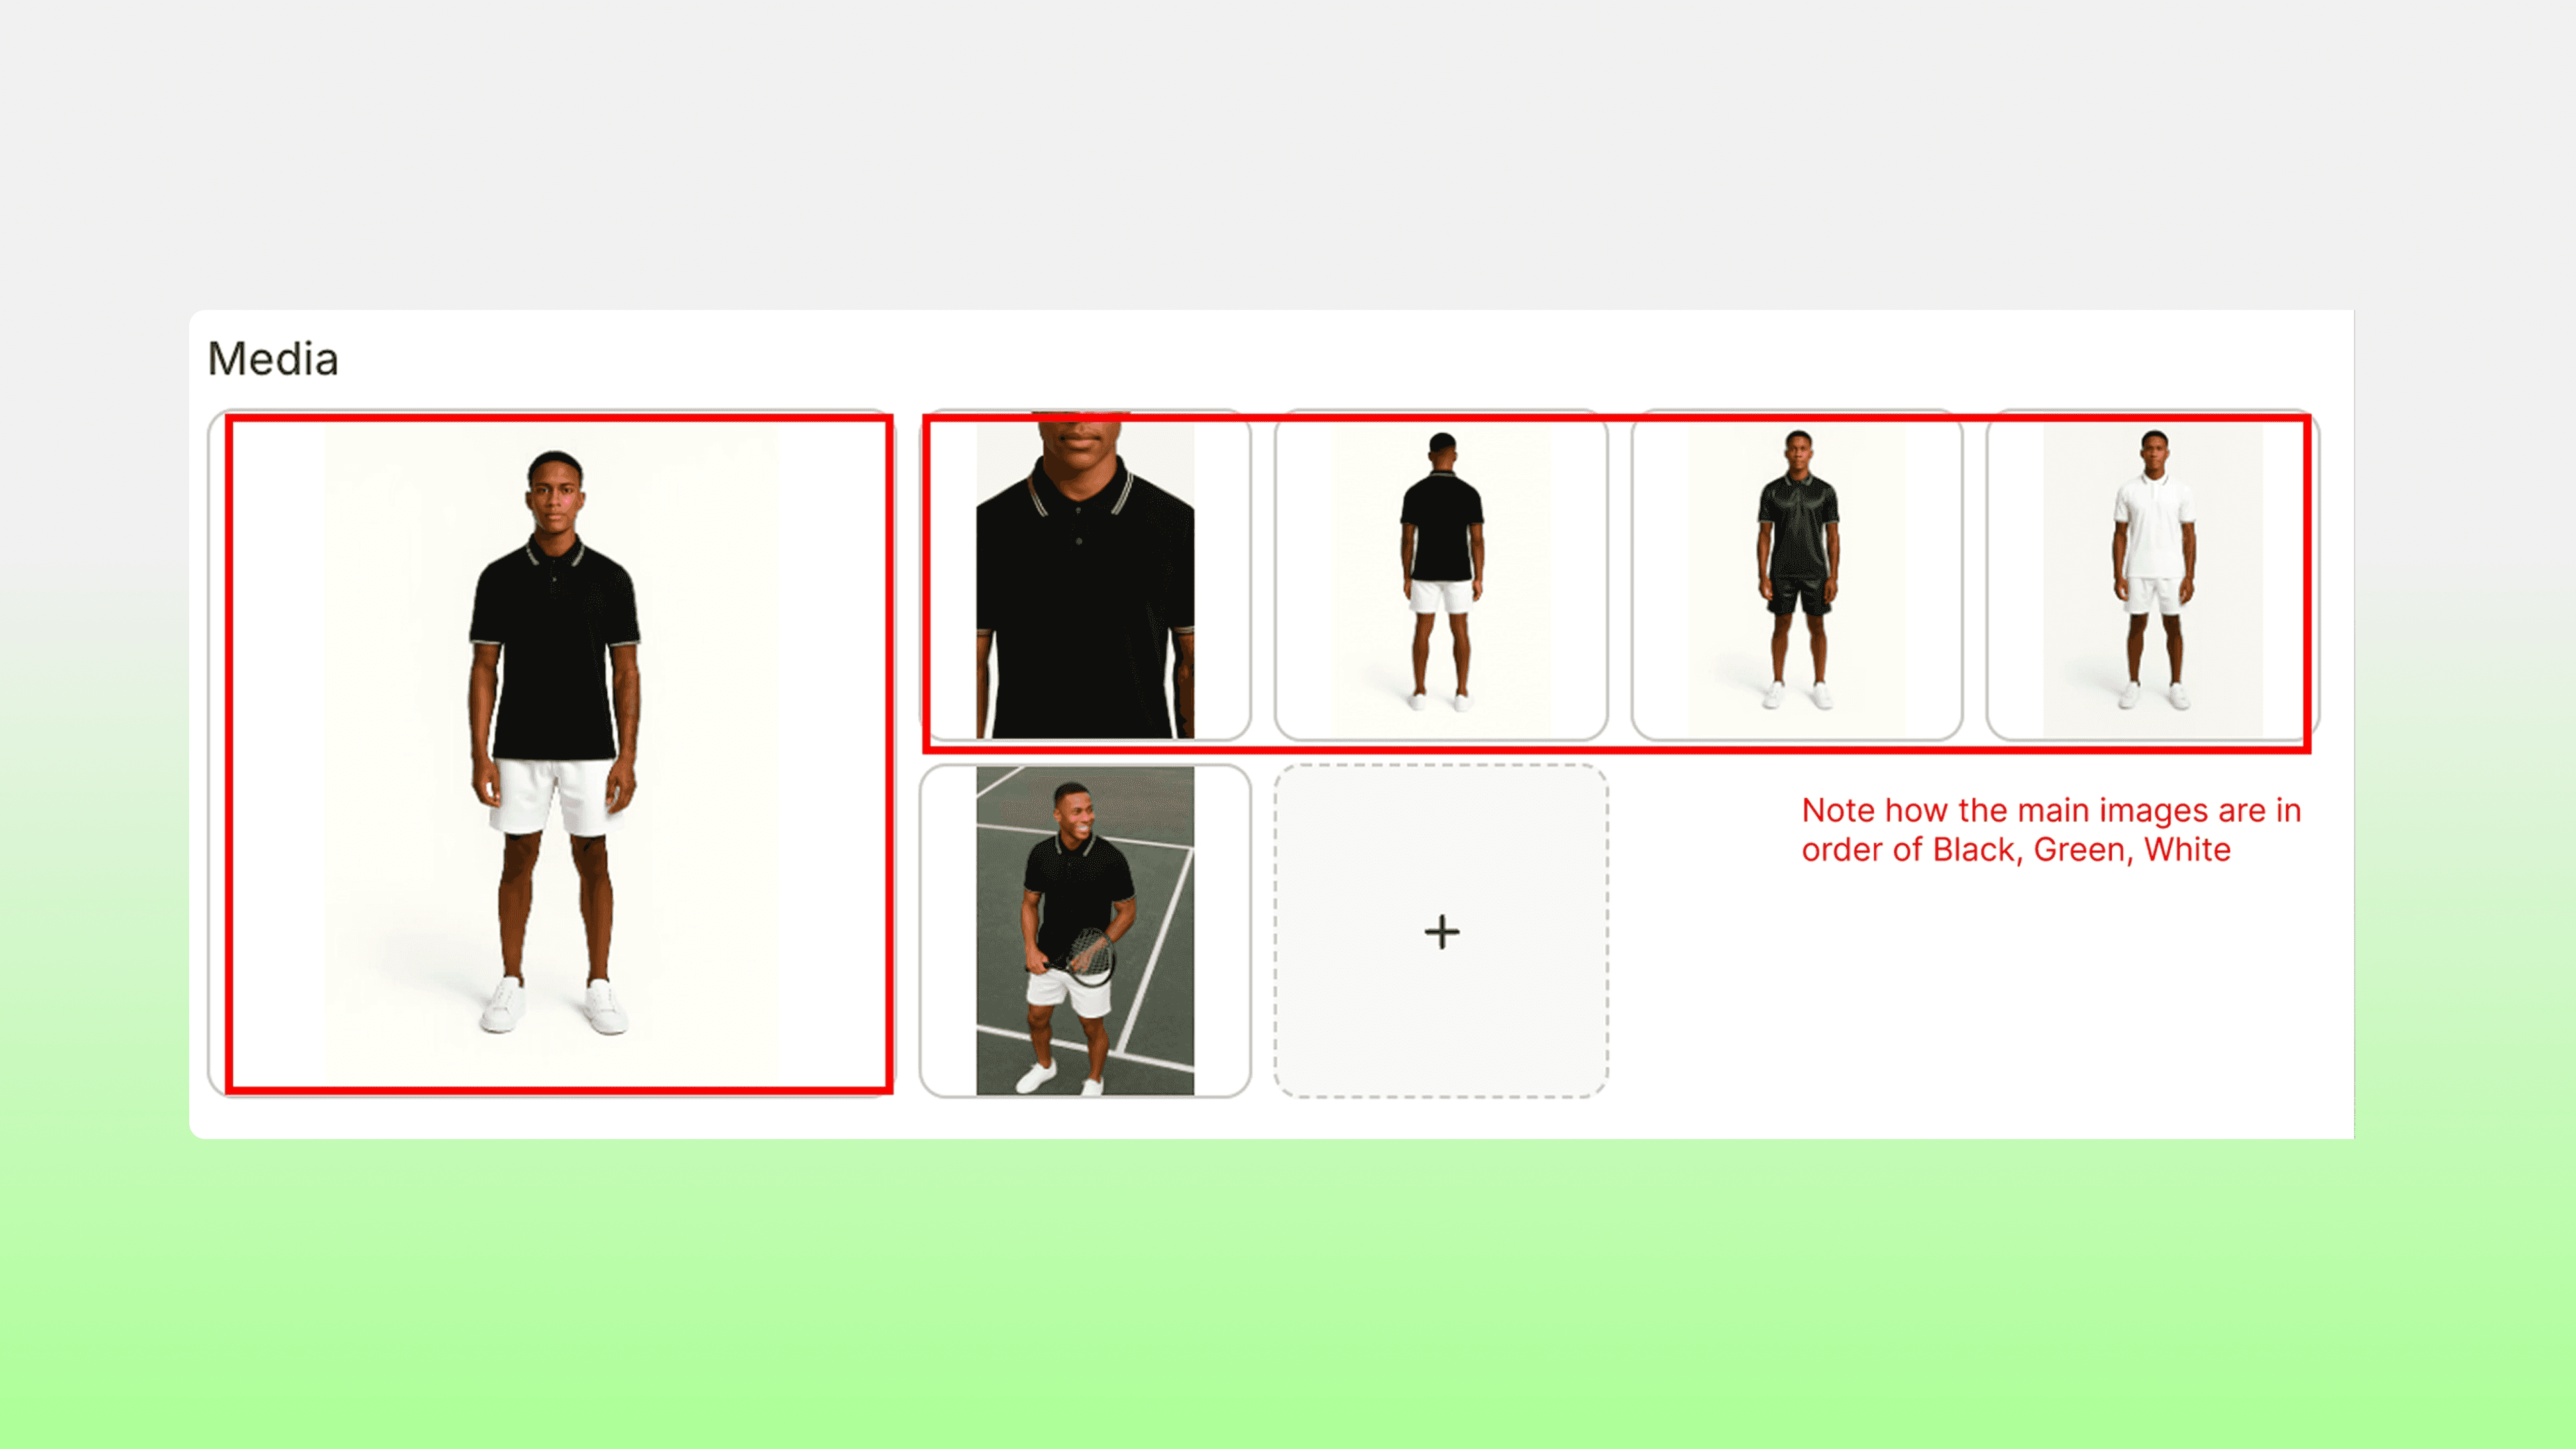
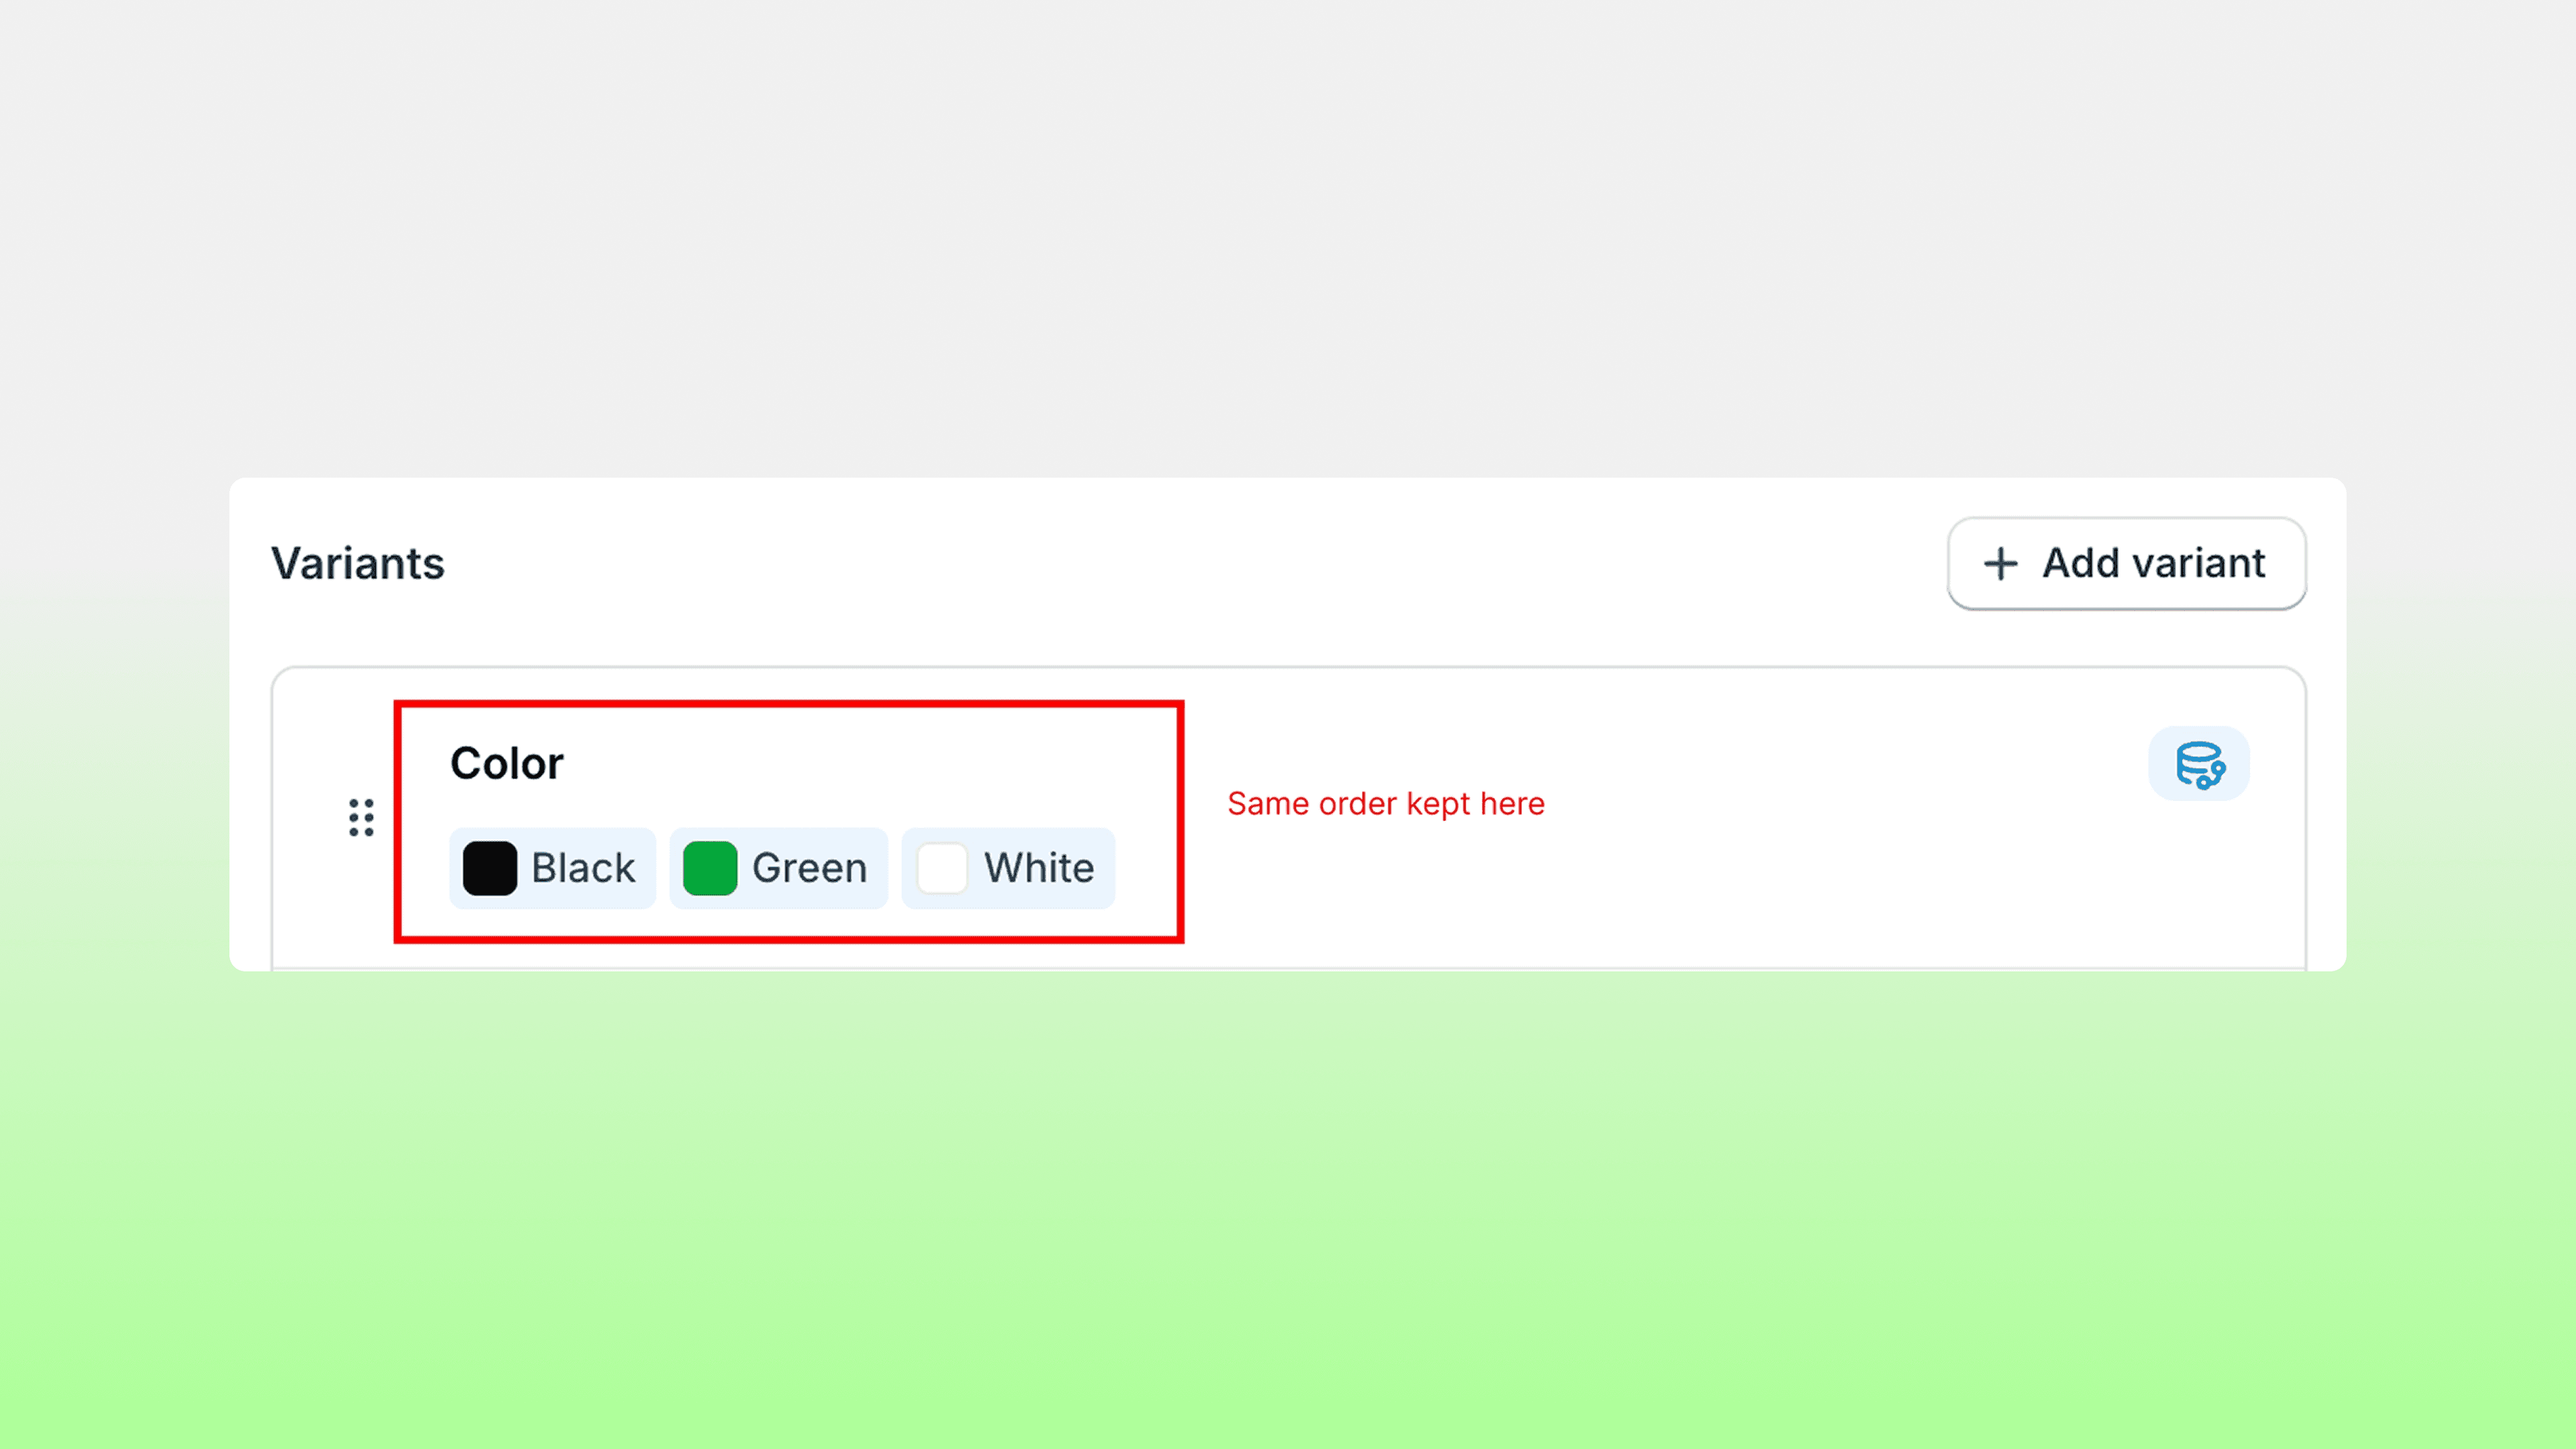
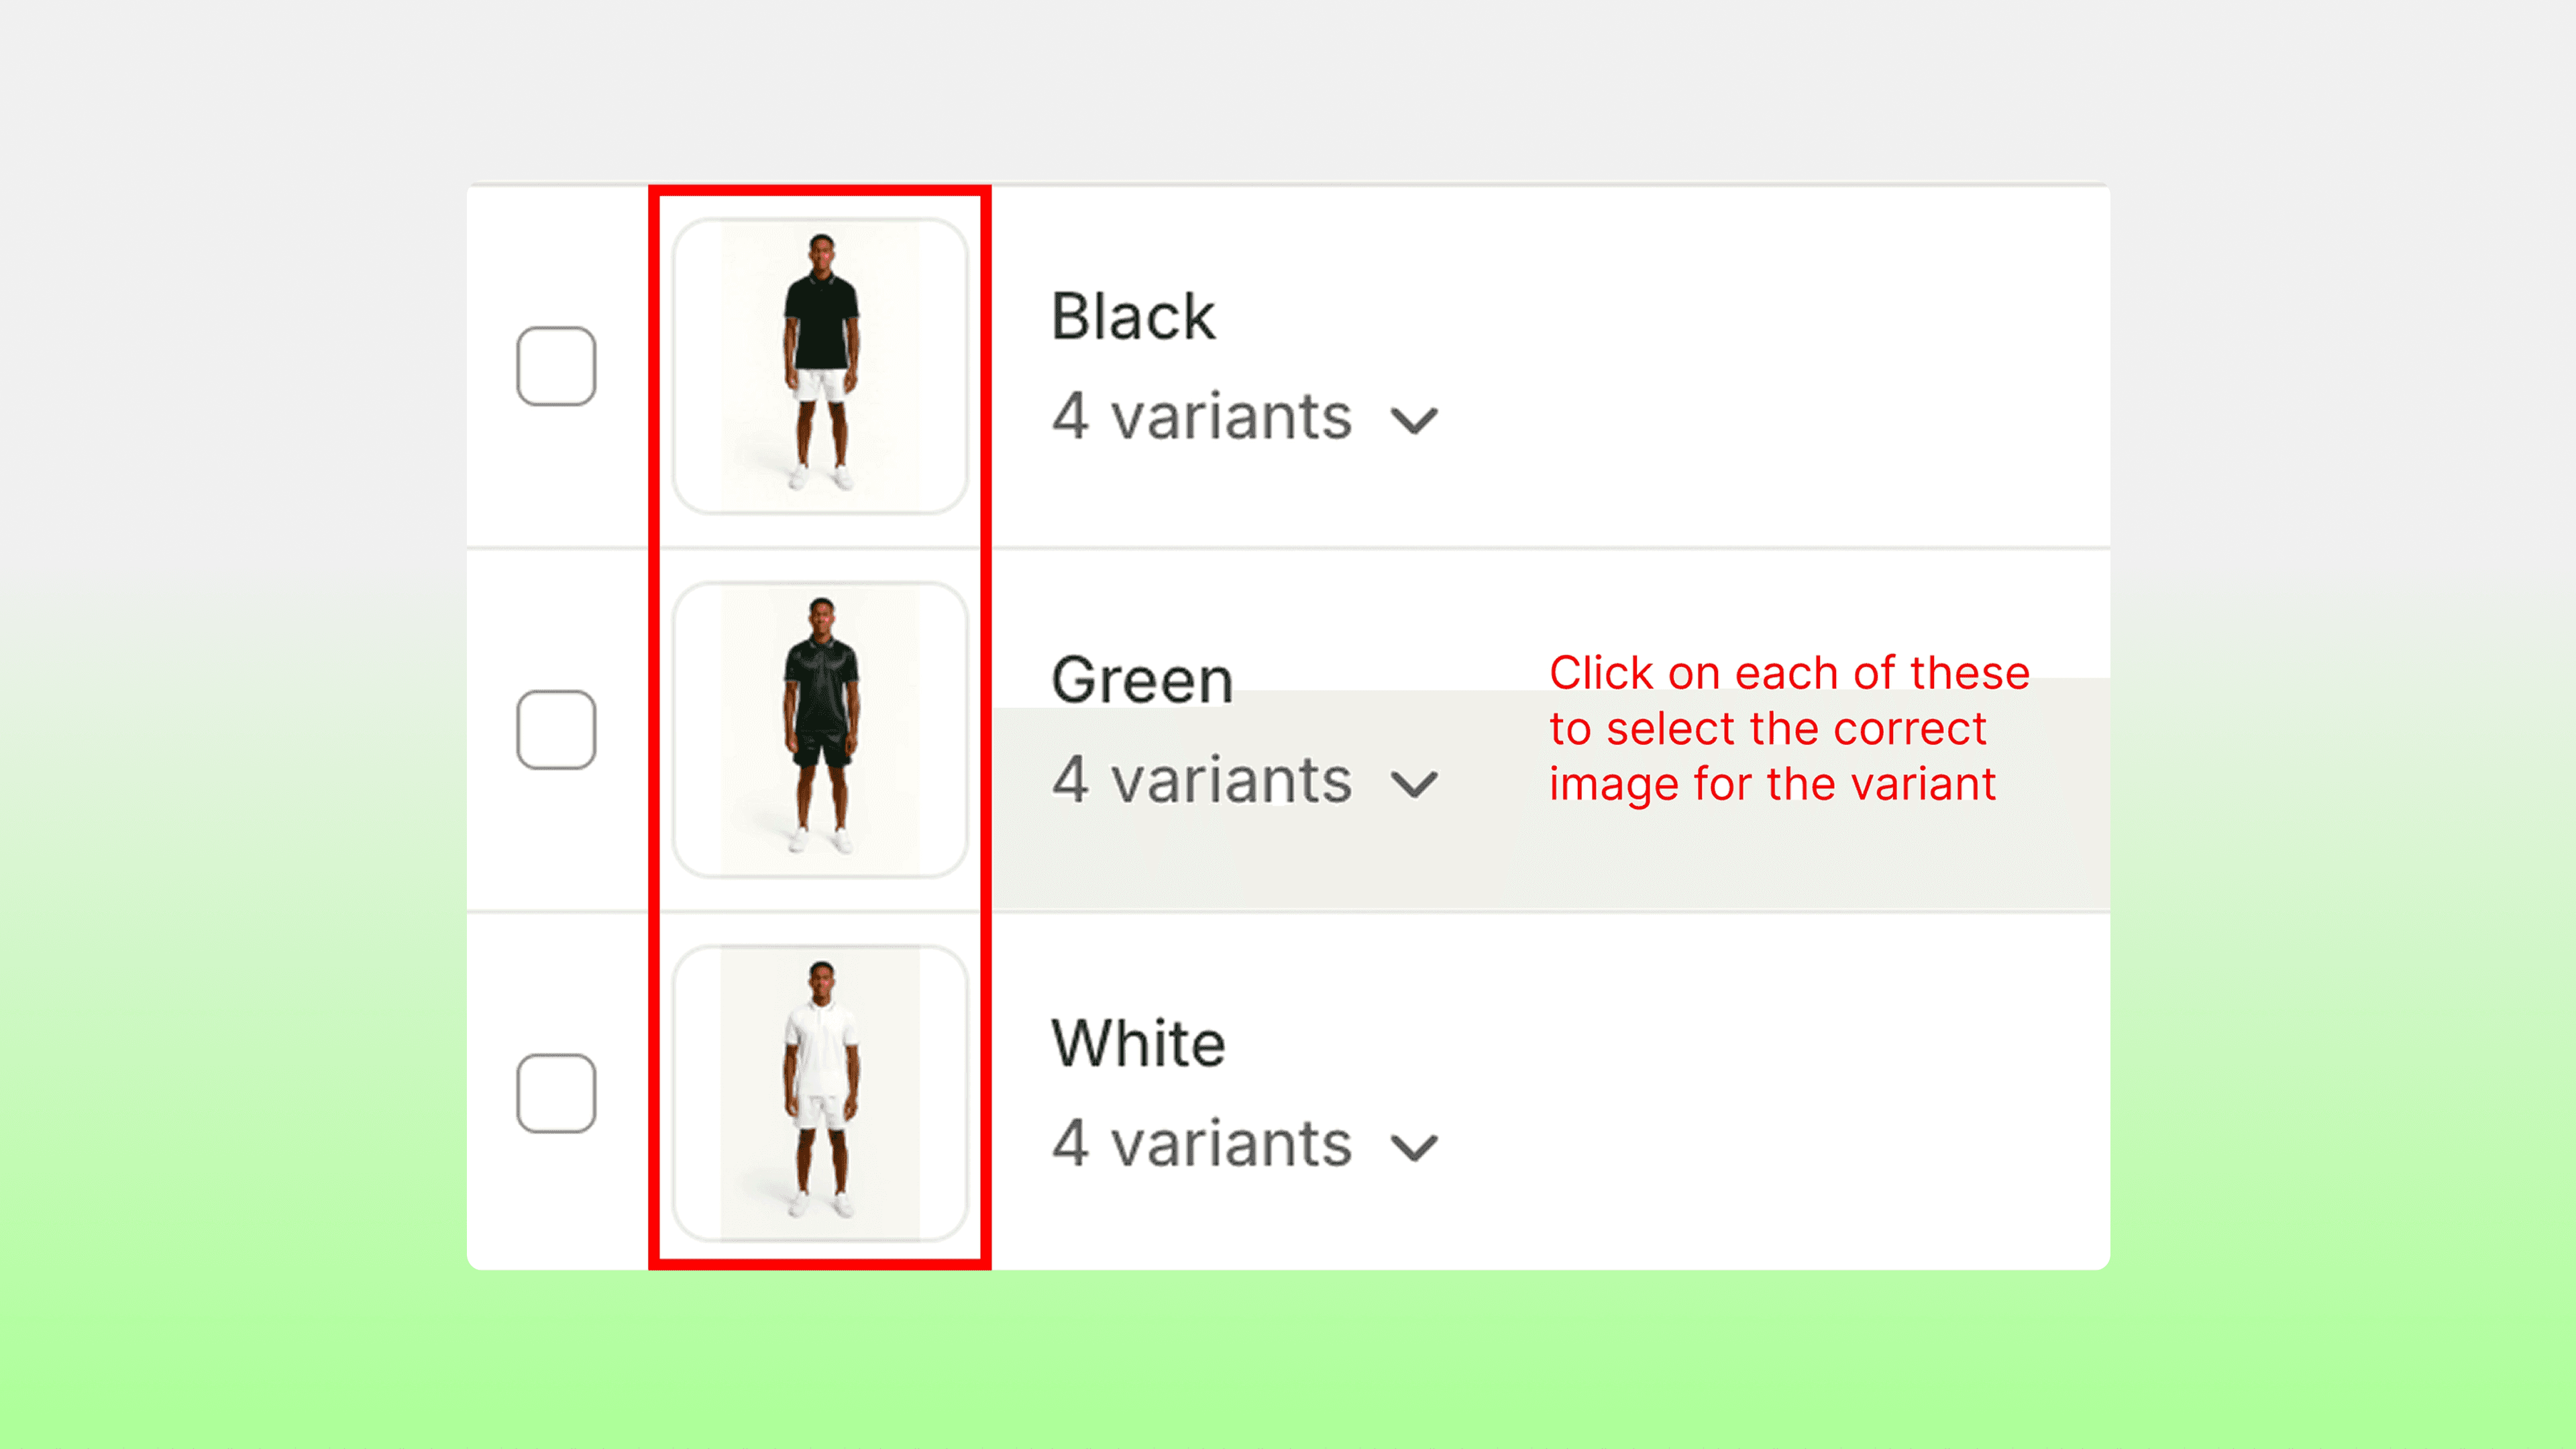
In your Shopify product details, ensure your image order matches your variant order exactly, as well as connecting each one by clicking the box next to each variant and selecting the correct image.
Connect the data in Framer
Once your store is connected, open your project and go to your product CMS detail page.
Open the Frameship plugin, log in and navigate to the Components tab.
Drag in the ‘Variant Selector’ component.
Click on the component, on the right you will see the Properties panel. Navigate down to the component settings.
Connect ‘Shopify Data’, ‘Variant Image Mapping’ and ‘Variant Options’ variables to the matching field from the CMS.
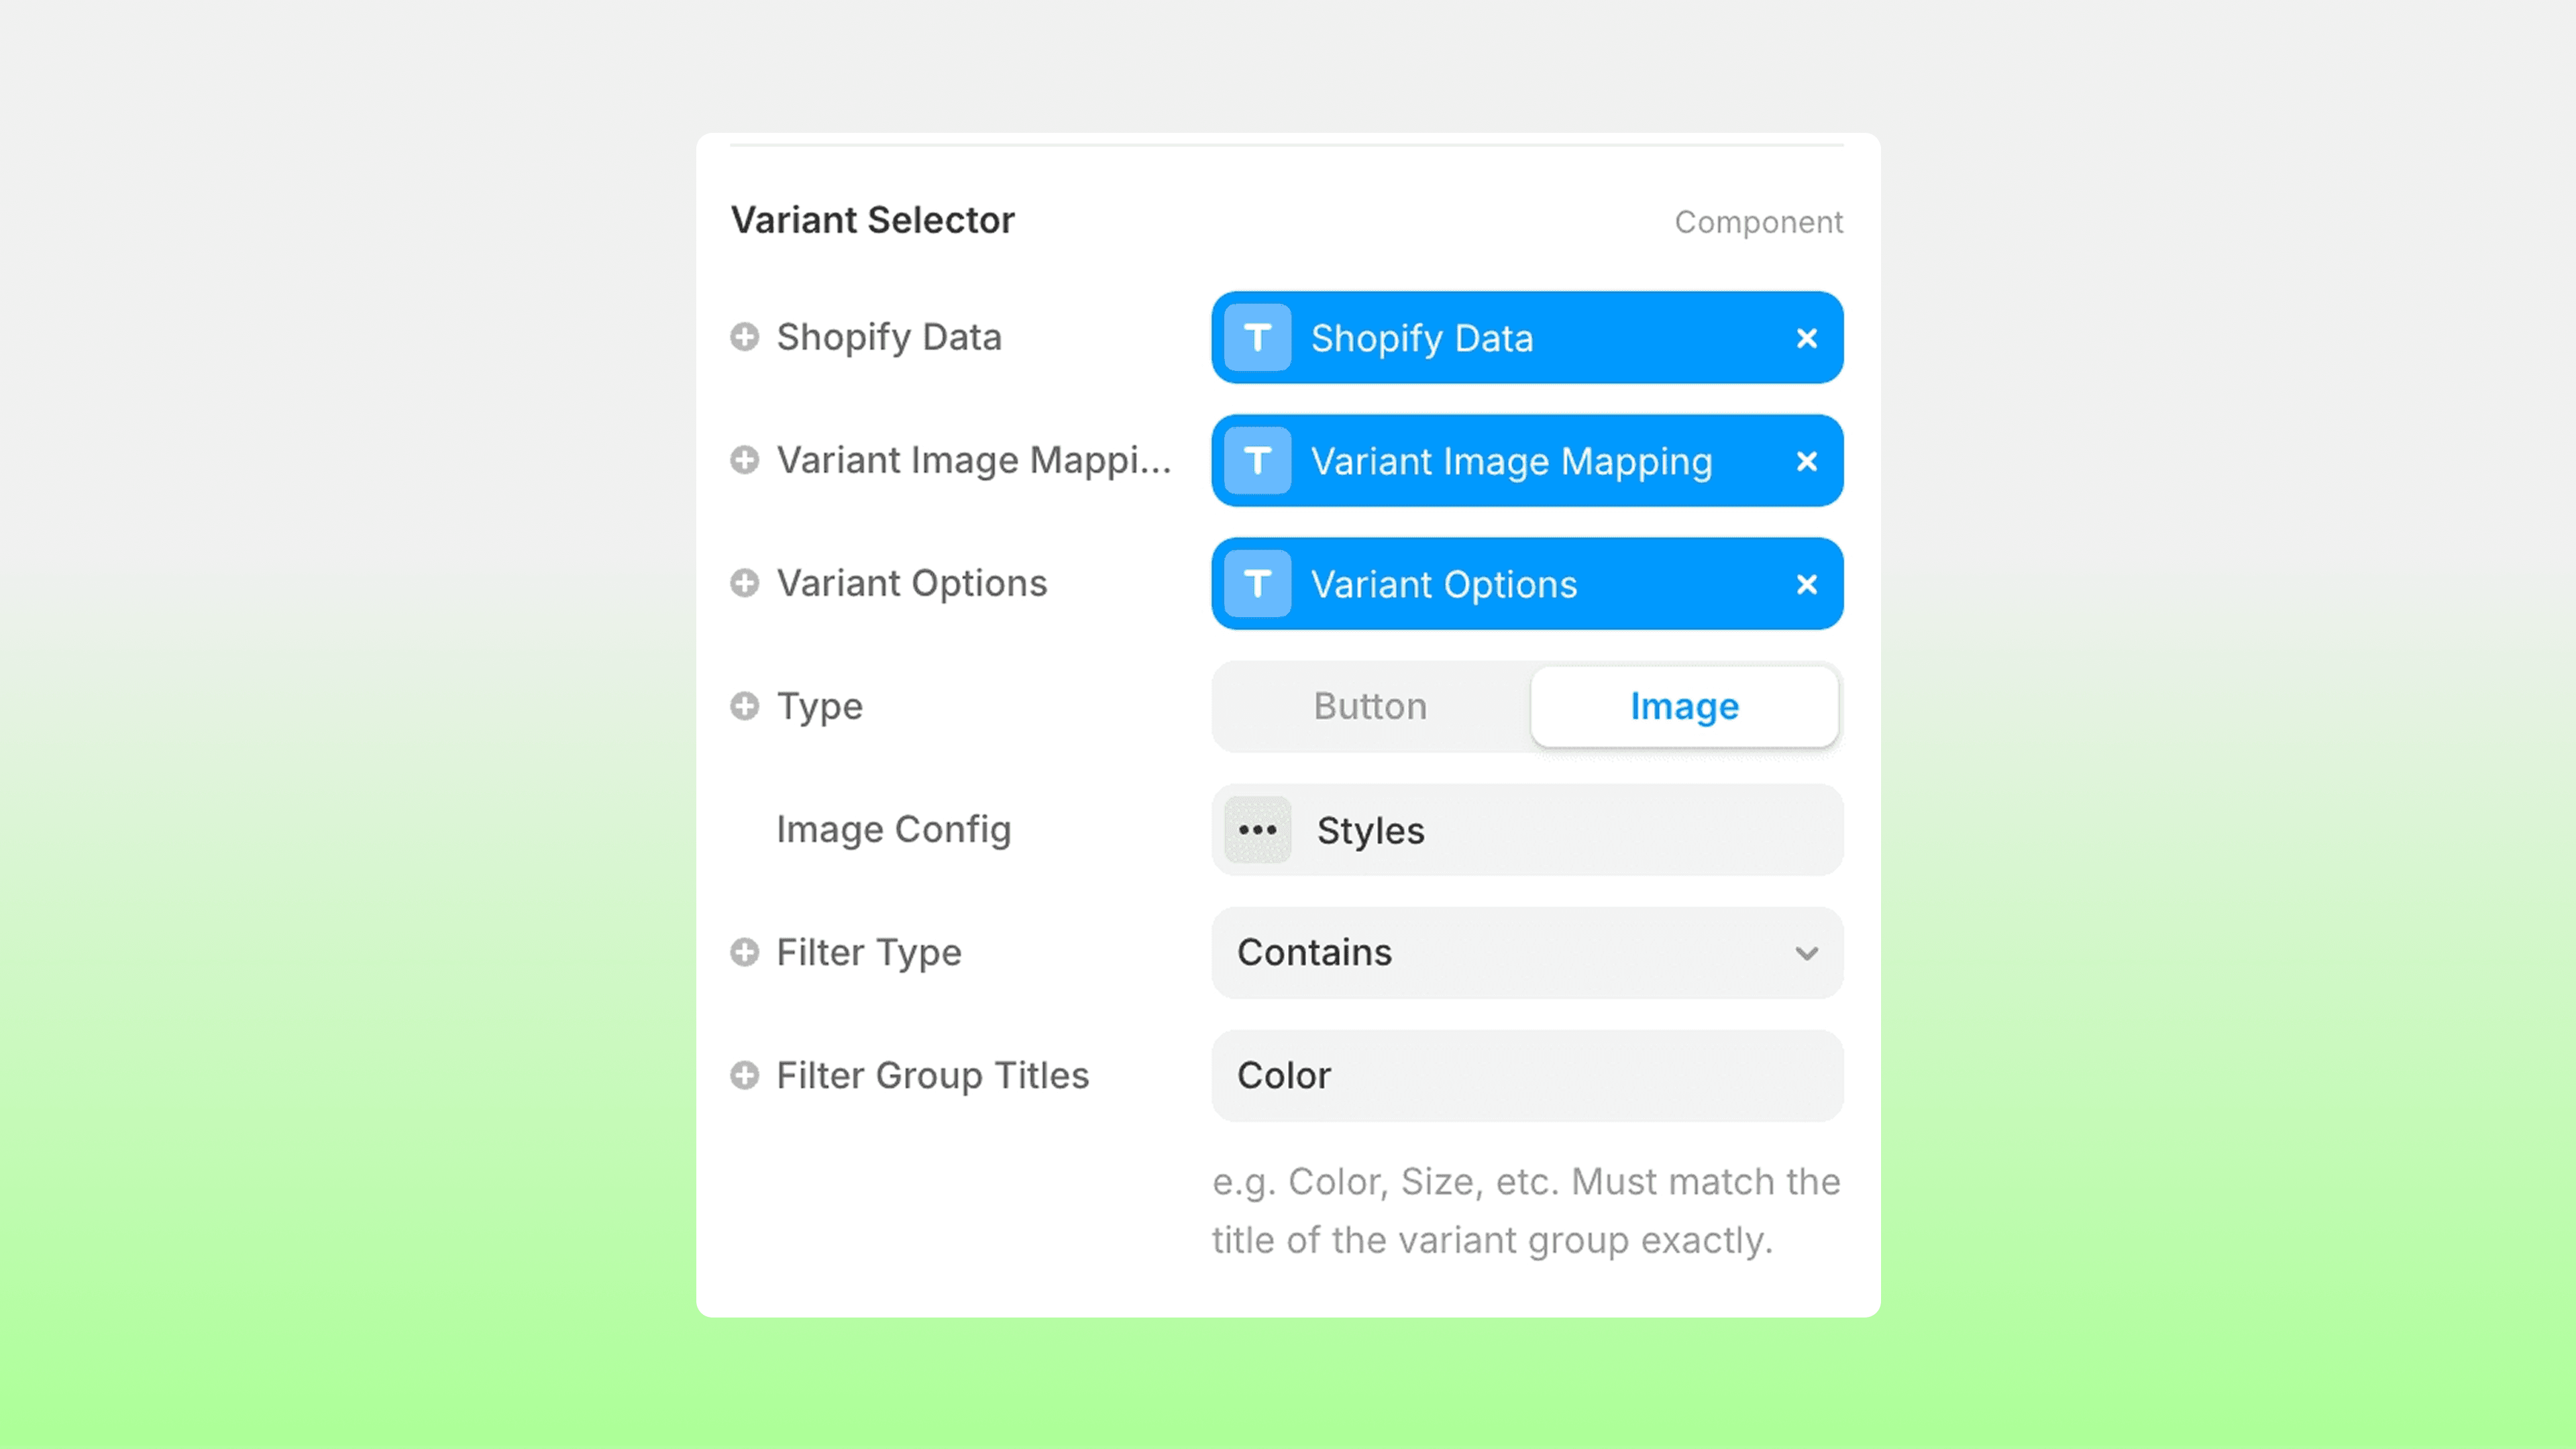
Set the filter type to either ‘Contains’ (to pick a specific variant) or ‘Doesn’t Contain’ (to exclude a certain variant).
Type in the filter name exactly as it is in the CMS/Shopify.
Use the component settings to tweak the design, layout and look as you wish!
💡 Note: To ensure this component does not leave an empty gap when it is not applicable to a different product or variant, make sure you use Margin settings under Layer Style in the component settings, instead of a gap on the parent layer.
There you go! You have successfully set up your Shopify product variants in Framer with Frameship.