setup
COMPONENTS
INTEGRATIONS
FAQ
Migrating to the New Frameship Filters
Already have filters on your store? You don't have to rebuild from scratch. Frameship finds your old components and walks you through replacing each one, right inside the plugin.
Where to find it
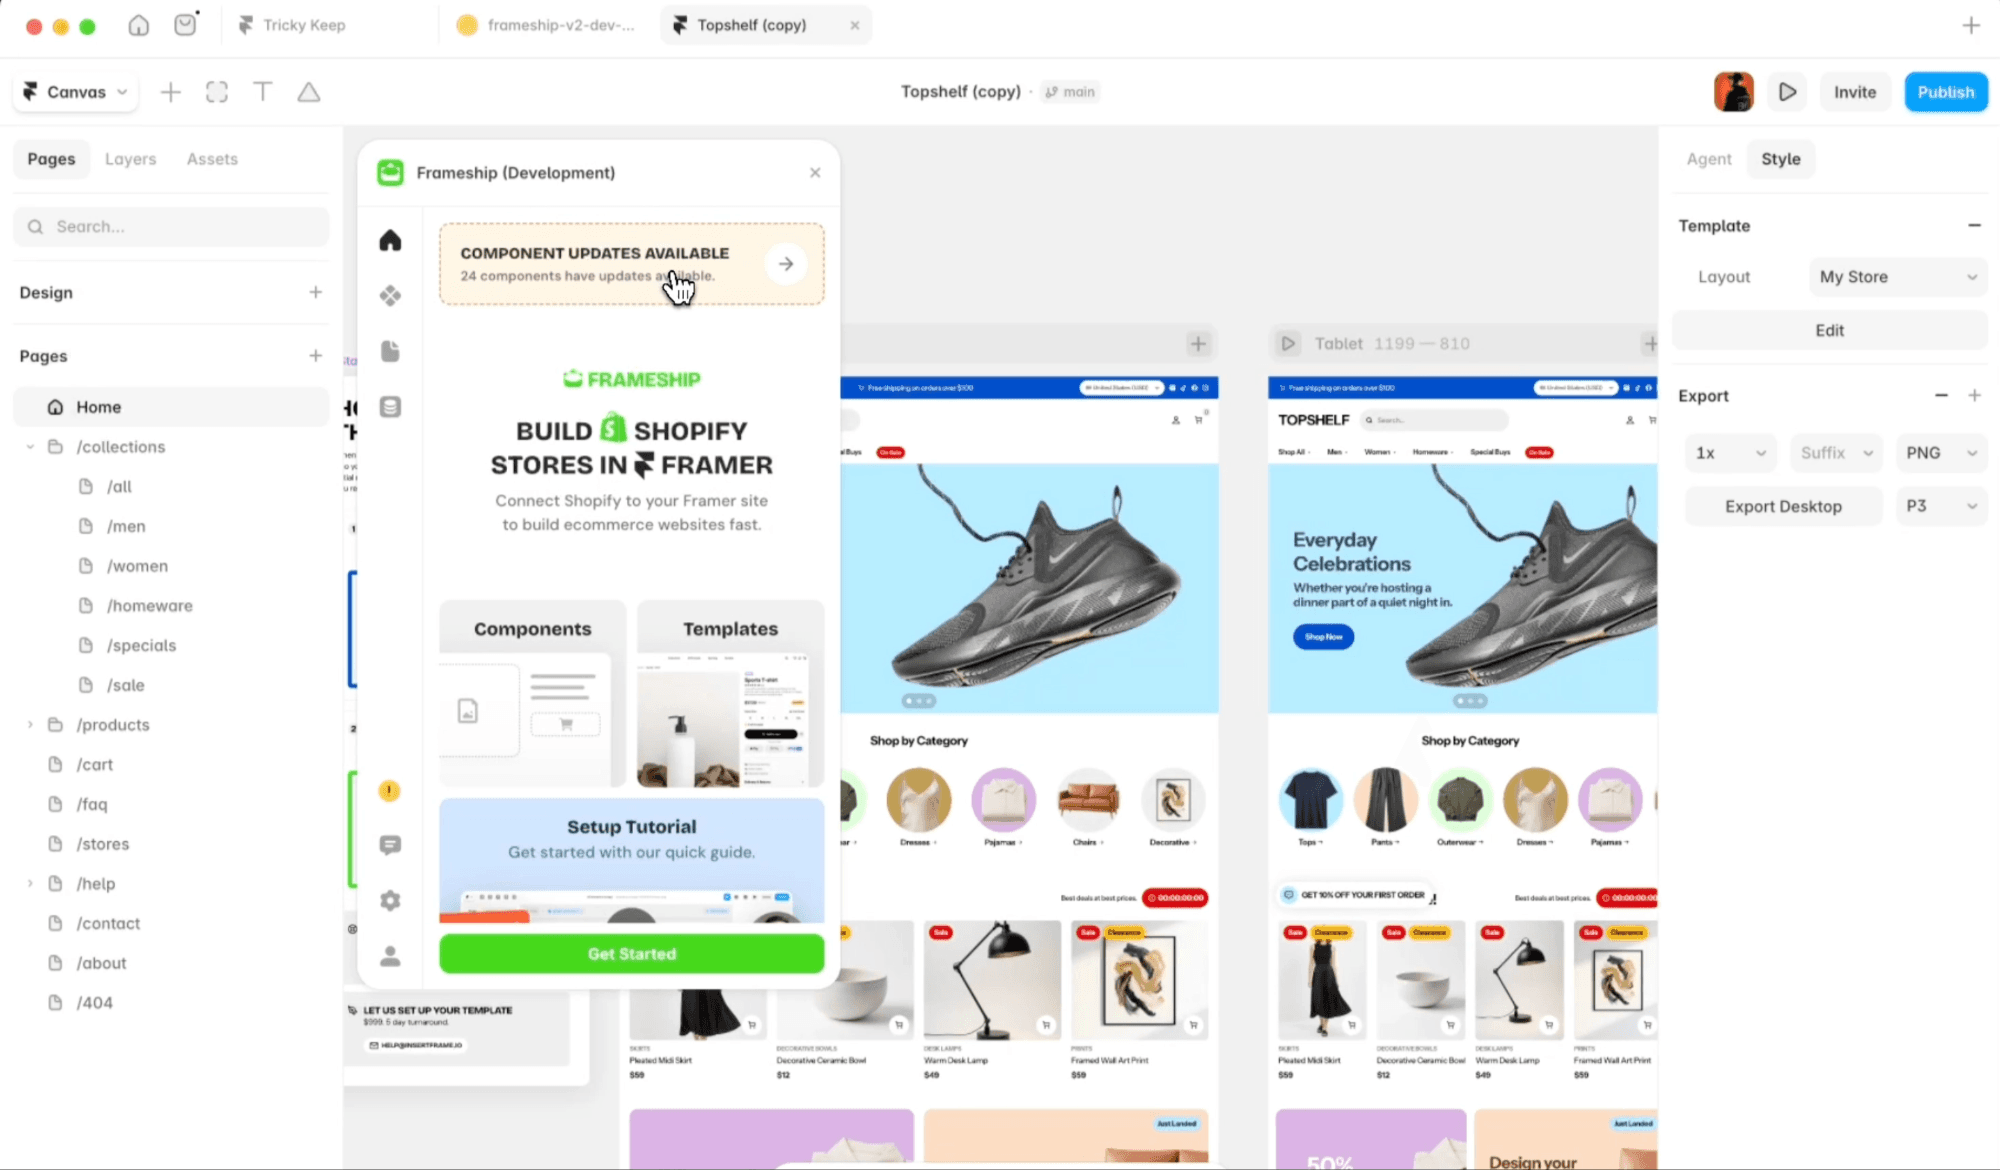
Open the Frameship plugin. If there are old components in your project, an Updates Available panel appears on the plugin homepage showing what was found:
Legacy filters - your existing Frameship filter components
Framer Commerce - components from Framer Commerce, if you're moving over from it
Each one shows how many components it found. Click Start on the one you want to work through.
The rule to remember
Add the new version and get it working before you remove the old one. Match your fields and your design first, then remove.
Your published site keeps running the old filters the whole time. Nothing changes for shoppers until you publish.
Step 1 - Start with the collection
Always begin with Filter Orchestrator → Frameship Collection. Everything else connects to it, so it needs to exist first.
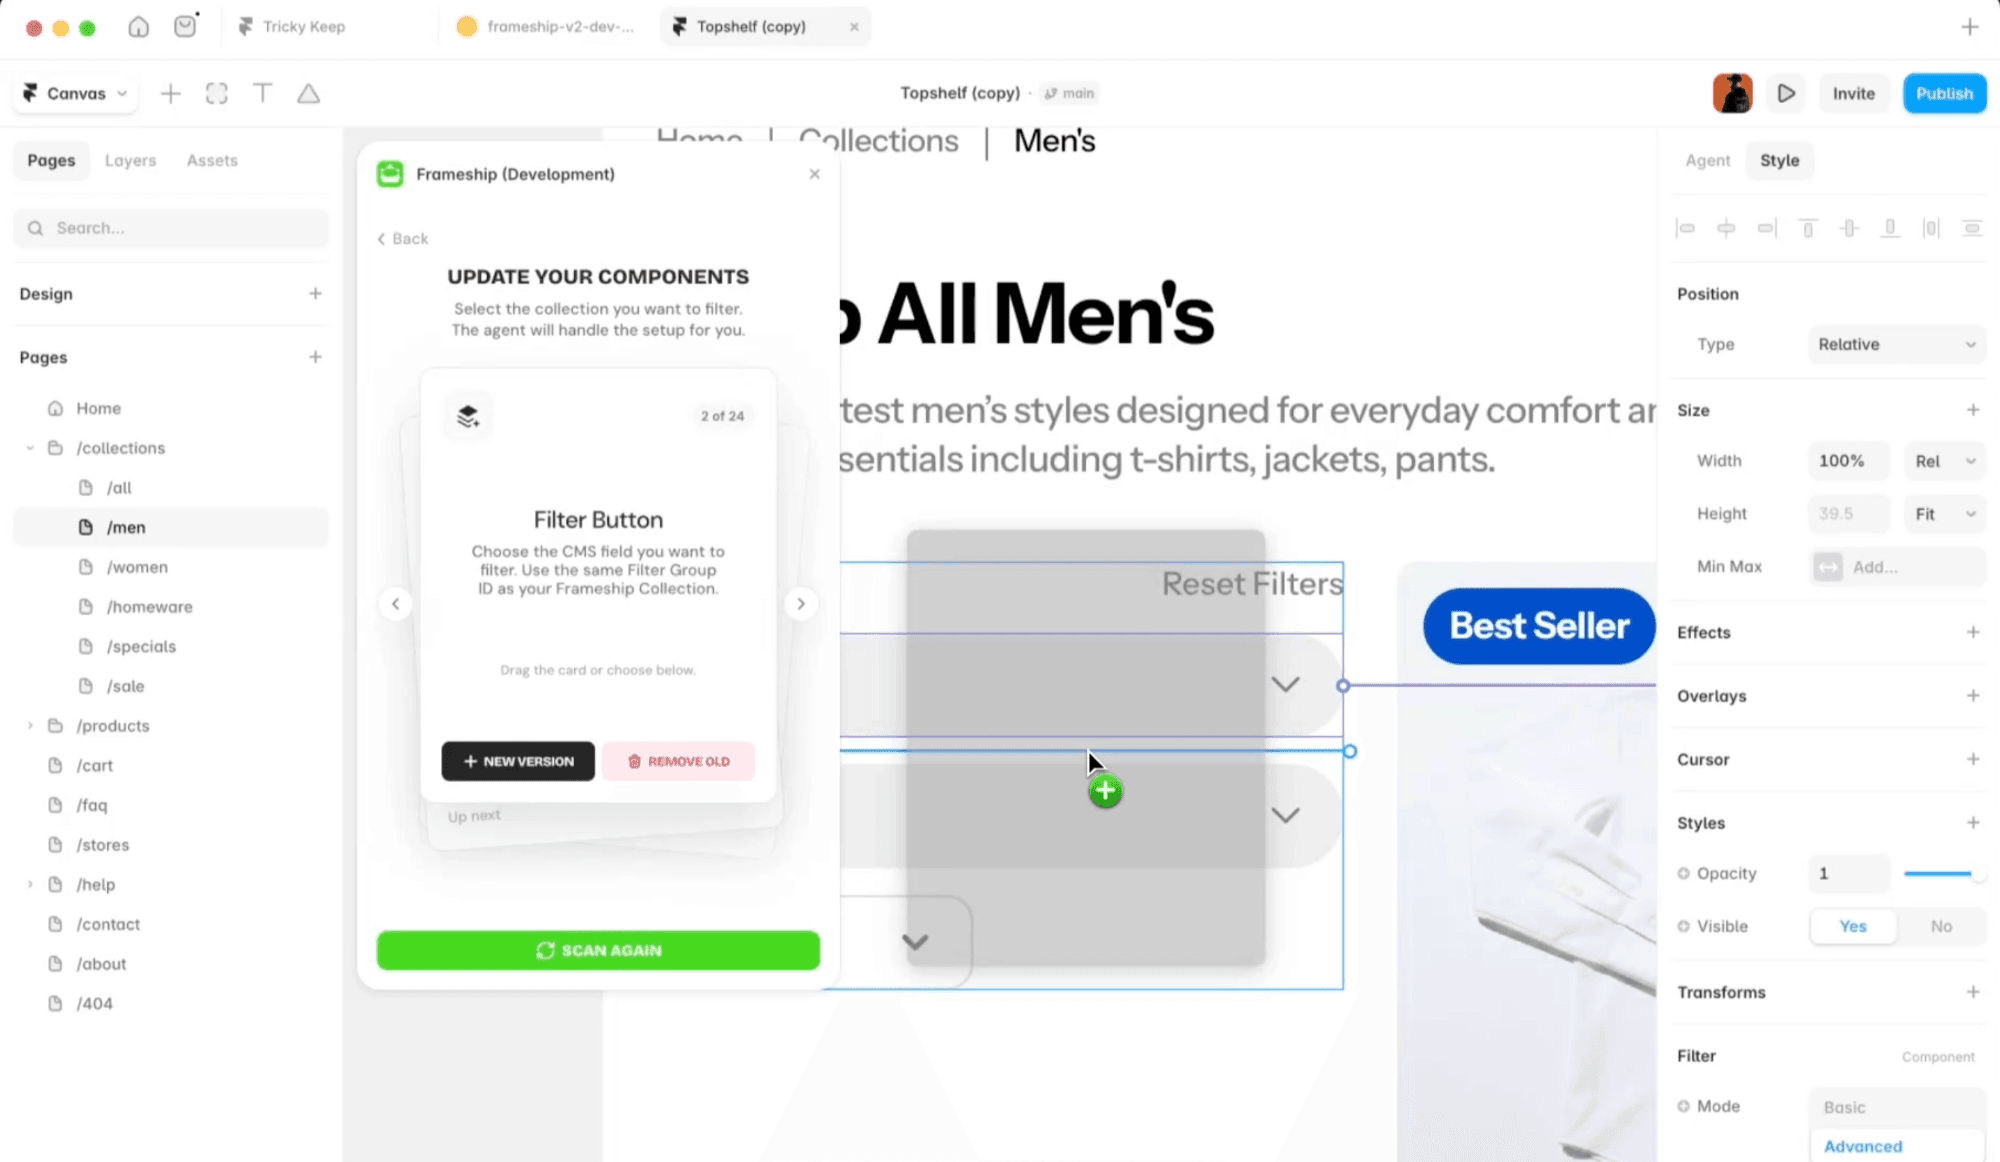
Find that row in the list and click Add new version
Connect your CMS list
Set a Filter Group ID. Any name works, something like
shopis fine
Step 2 - Work through the rest
Each row shows the old component and what it becomes, along with the name of the component it found in your project:
Filter Button → Filter Buttons. Choose the CMS field you want to filter, and use the same Filter Group ID as your Frameship Collection.
Favourite Button → Favorite Button. Place the new one inside your product card, within the Frameship Collection rather than beside it. Note the spelling changed from Favourite to Favorite.
For each row, click Add new version, then set it up. The same Filter Group ID as your collection, the right CMS field, and styling to match what you had.
Step 3 - Match, then remove old
Once the new component does what the old one did, click Remove old on that row.
While both are on the canvas the page will look doubled up. That's expected. Old and new components don't work together, so it resolves as you remove each old one.
Step 4 - Scan again
Click Scan again to refresh the list and check nothing has been missed. When the list is empty, you're done. Preview, then publish.
Moving from Framer Commerce
Exactly the same flow. Frameship detects Framer Commerce components on your canvas and suggests the closest Frameship replacement for each one. Click Start on the Framer Commerce row and work down the list the same way.
Good to know
Old and new filter components don't mix on the same collection. Replace the whole set on a page rather than running both.
Your live site keeps working throughout. Only publishing changes what shoppers see.
Do it in a preview or a draft page first if you'd rather not touch the live version.
See Getting Started with Product Filters for the full setup of the new system.
RELATED DOCUMENTATION


