setup
COMPONENTS
INTEGRATIONS
FAQ
How to add a personalization field to your product page
The Personalization Input allows customers to add additional information to their order. This information is sent through to Shopify, so you can view it on the seller side.
You can configure this input in multiple formats, including:
Text input (short text)
Text area (long text)
Dropdown
Buttons
Checkbox
Date
You can also add multiple personalization inputs to a single product, and display all of them in the cart.
How to Set Up the Personalization Input in Framer
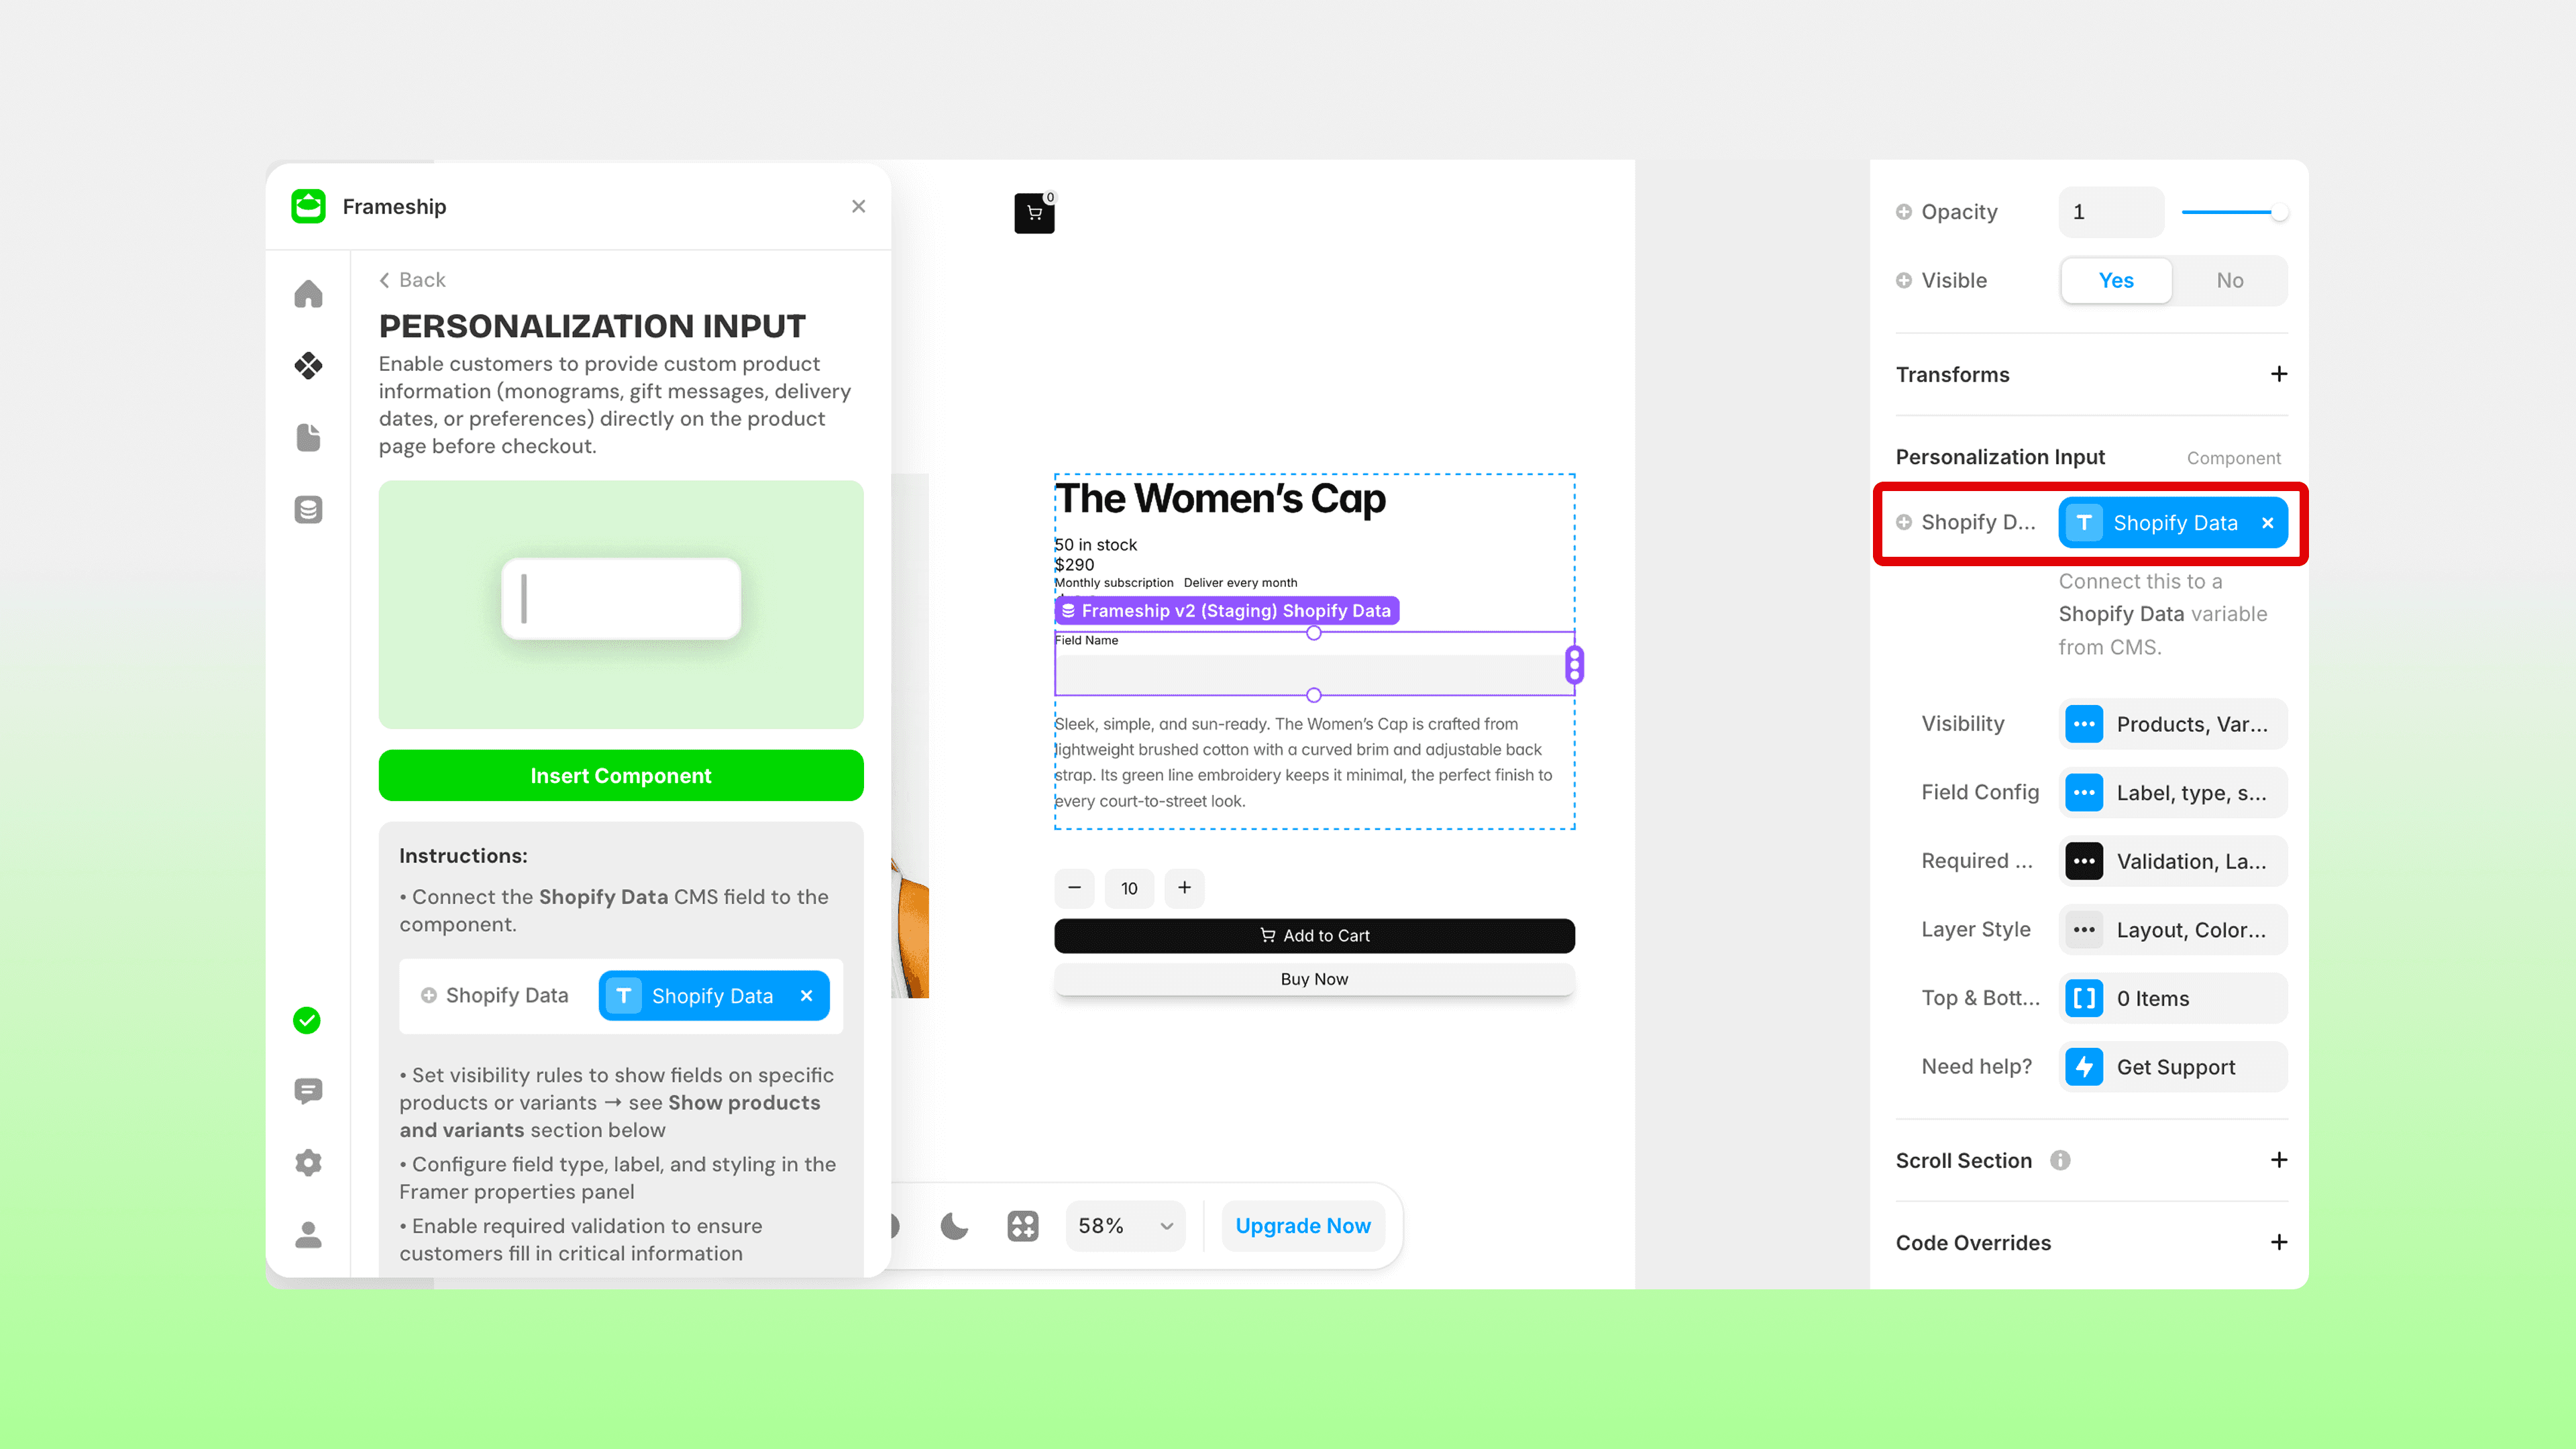
In your Framer project, open the Frameship plugin
Under Product, find the Personalization Input component. Insert it onto your Product CMS detail page
Attach the Shopify data in the right-hand Properties panel
💡 Note: To ensure this component does not leave an empty gap when it is not applicable to a different product or variant, make sure you use Margin settings under Layer Style in the component settings, instead of a gap on the parent layer.
Customization Options
In the Properties panel, you’ll find the following options:
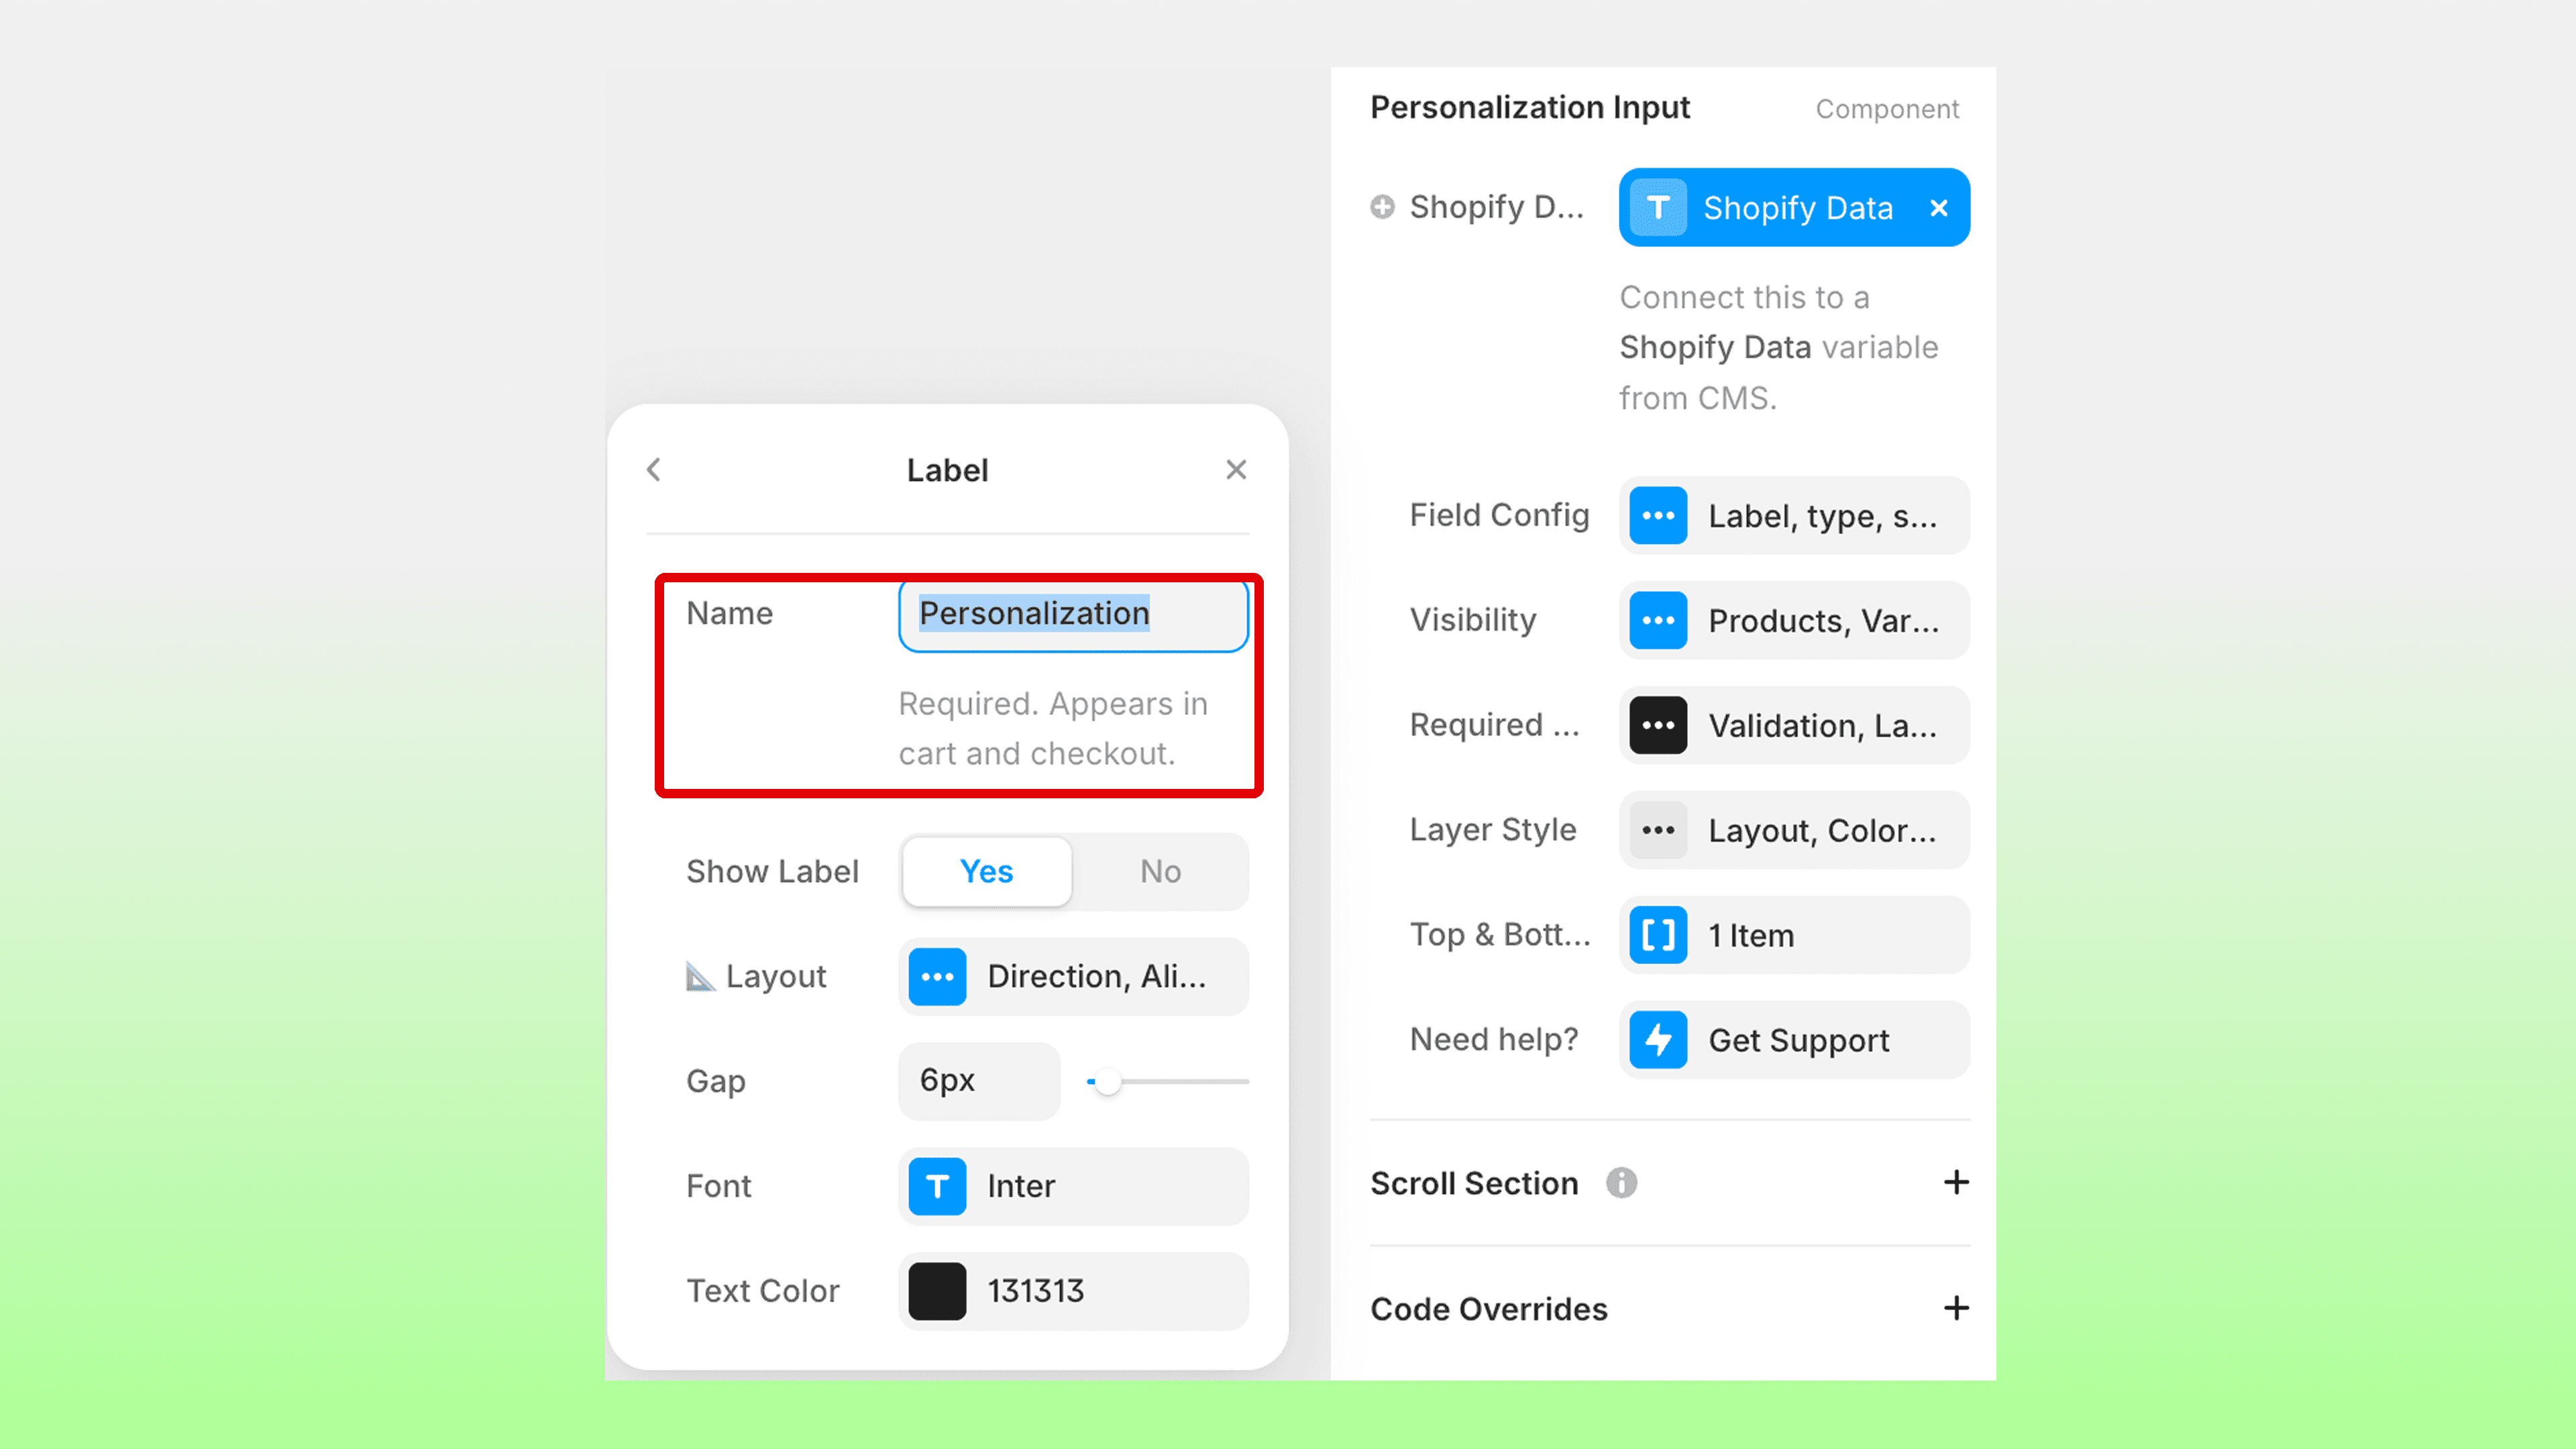
Field Config
Add a label for the input field (required)
Change the field type
Add a placeholder
Set the input type (email, phone, URL, etc.)
Visibility
Show or hide the input based on specific products or variants
Use the plugin data to connect product IDs or variants
This ensures the field only appears where needed
Required & Styling
Set whether the field is required
Adjust layout, spacing (gap), font, and text colour
Layer Style
Control layout, background, border radius, padding, and margin
Note: Margin is important to prevent empty space when the input is hidden on certain products
Top & Bottom Content
Add additional frames above or below the component
Adding the Personalization Input to your Cart
By default, personalization data will not appear in the cart. To display it:
Open your Cart List Item component (inside the Cart Layer)
Add a new text layer under the main text fields (title, variant, subscriptions)
In the right-hand Properties panel, click the + icon next to Content
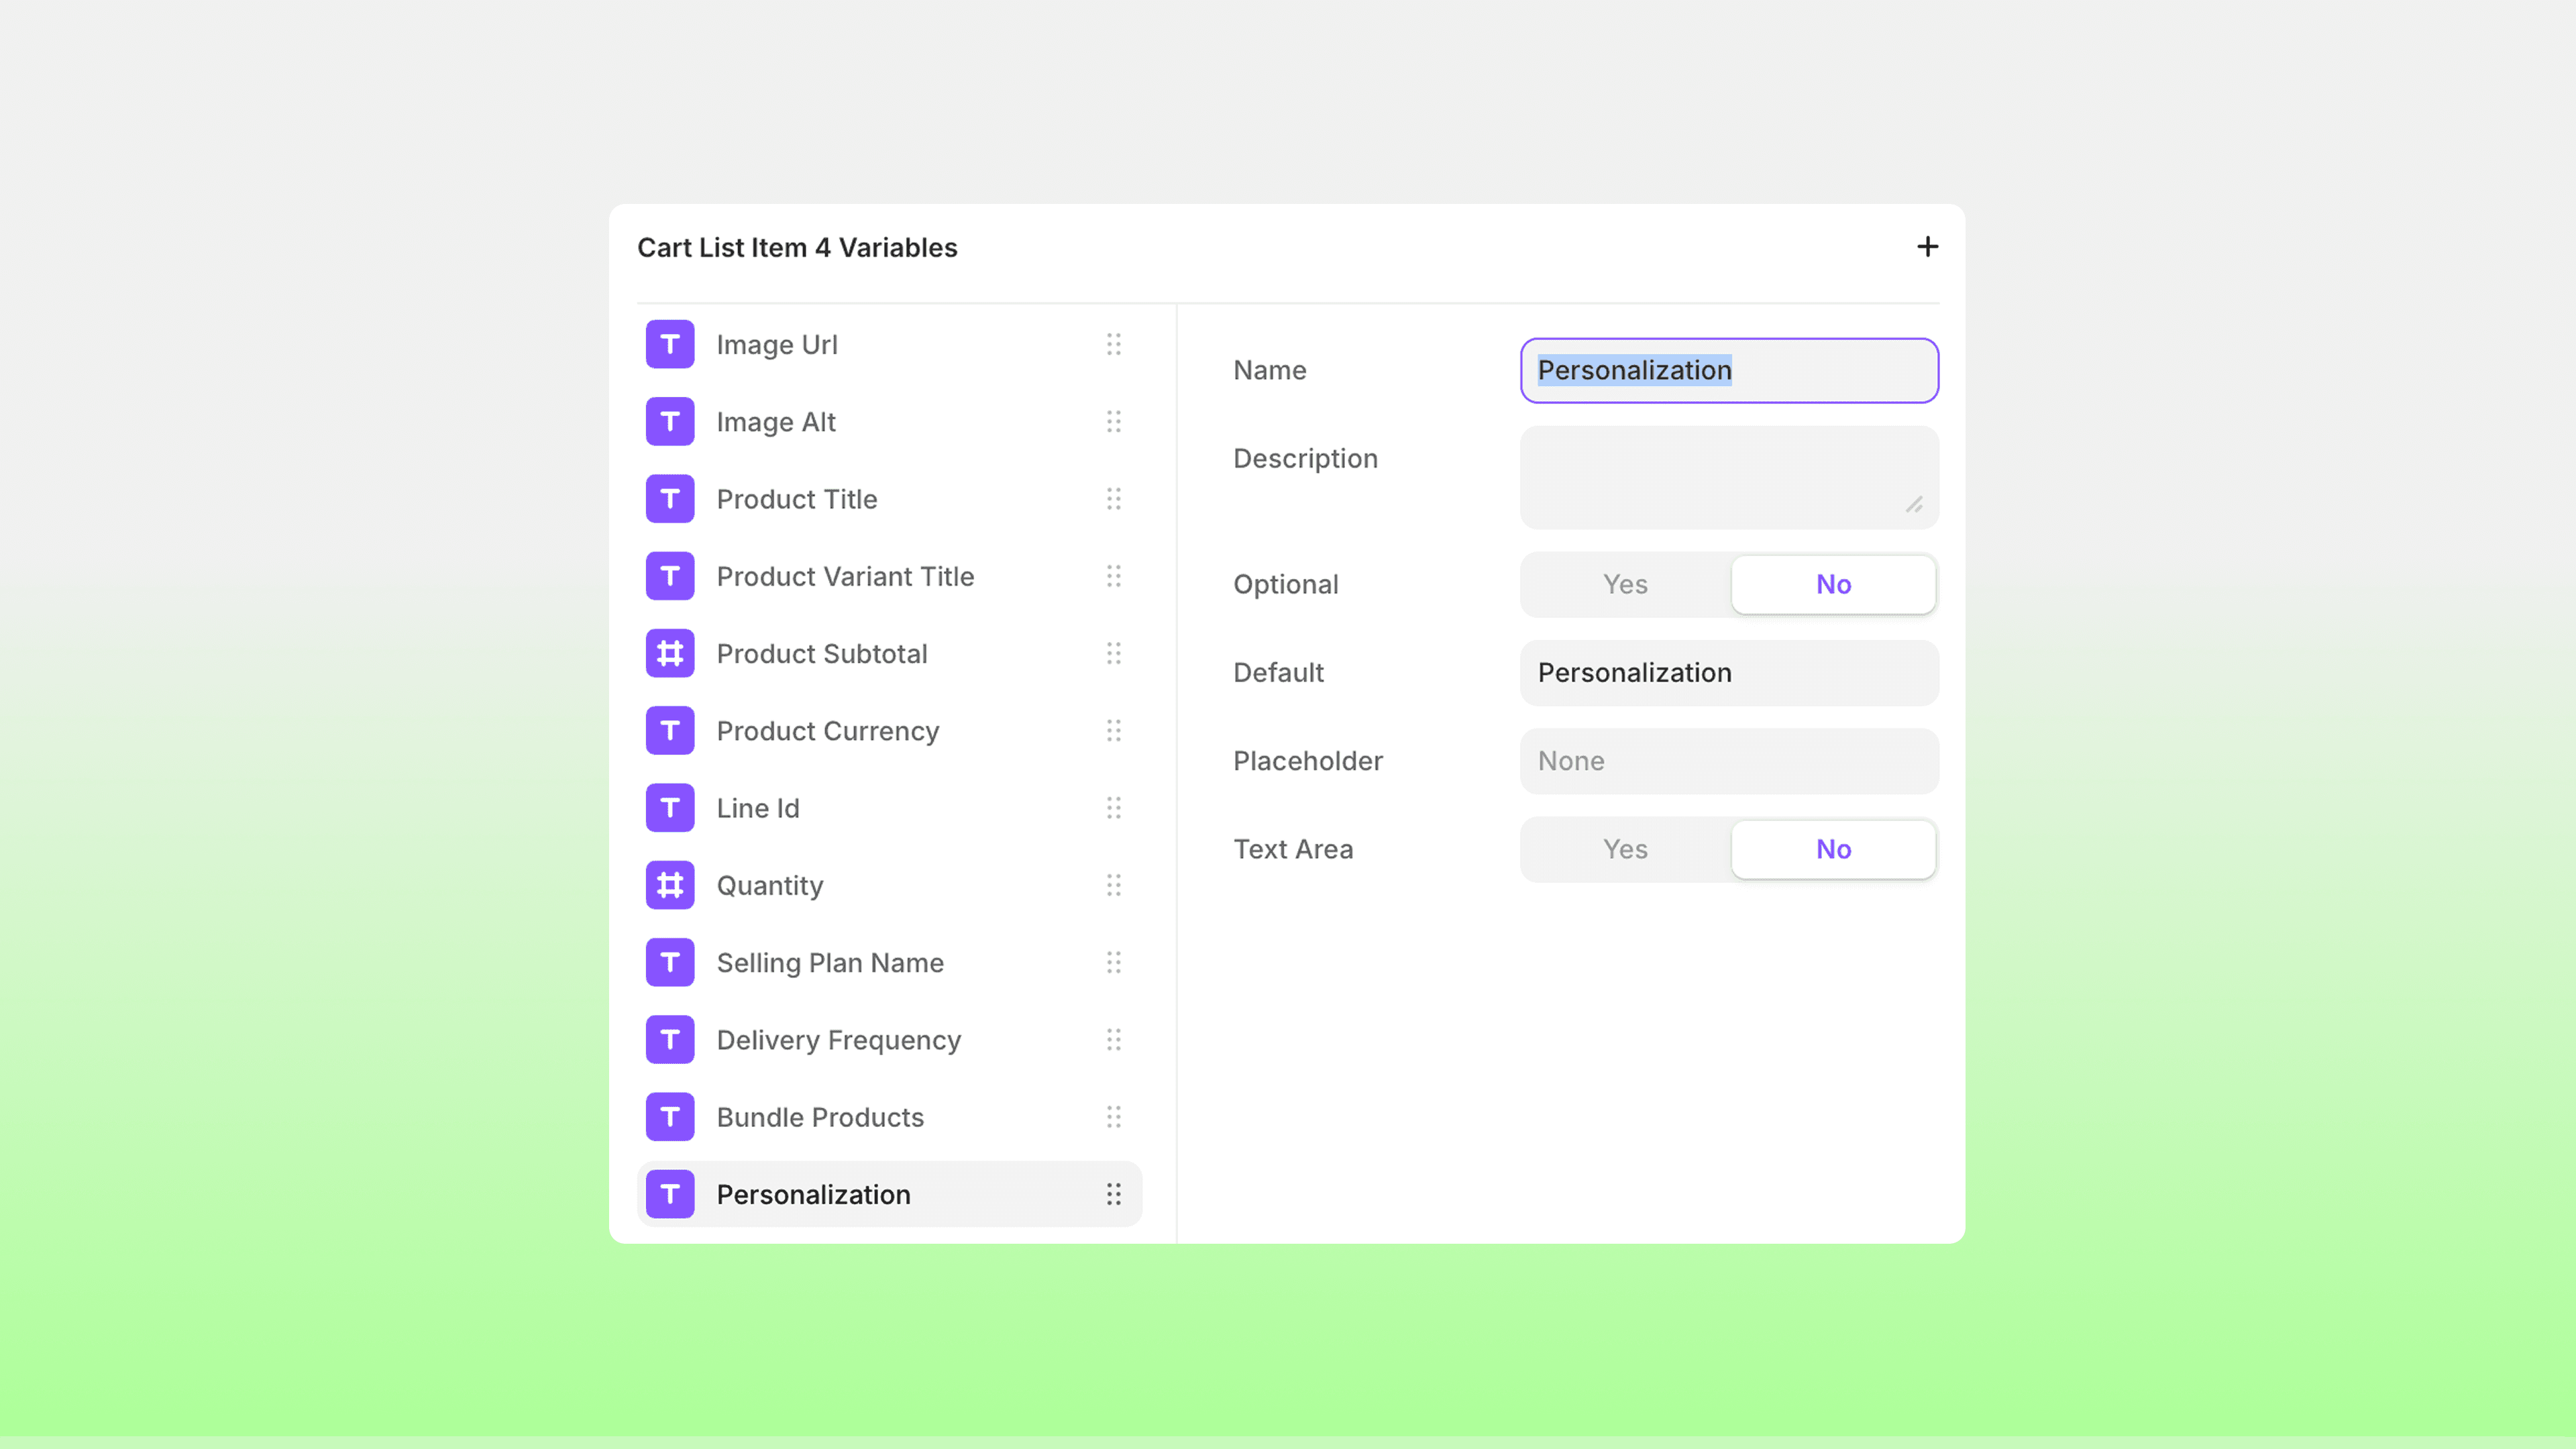
Select Create New Variable → Plain Text
Name it “Personalization” (or similar)
Save — the variable will connect automatically
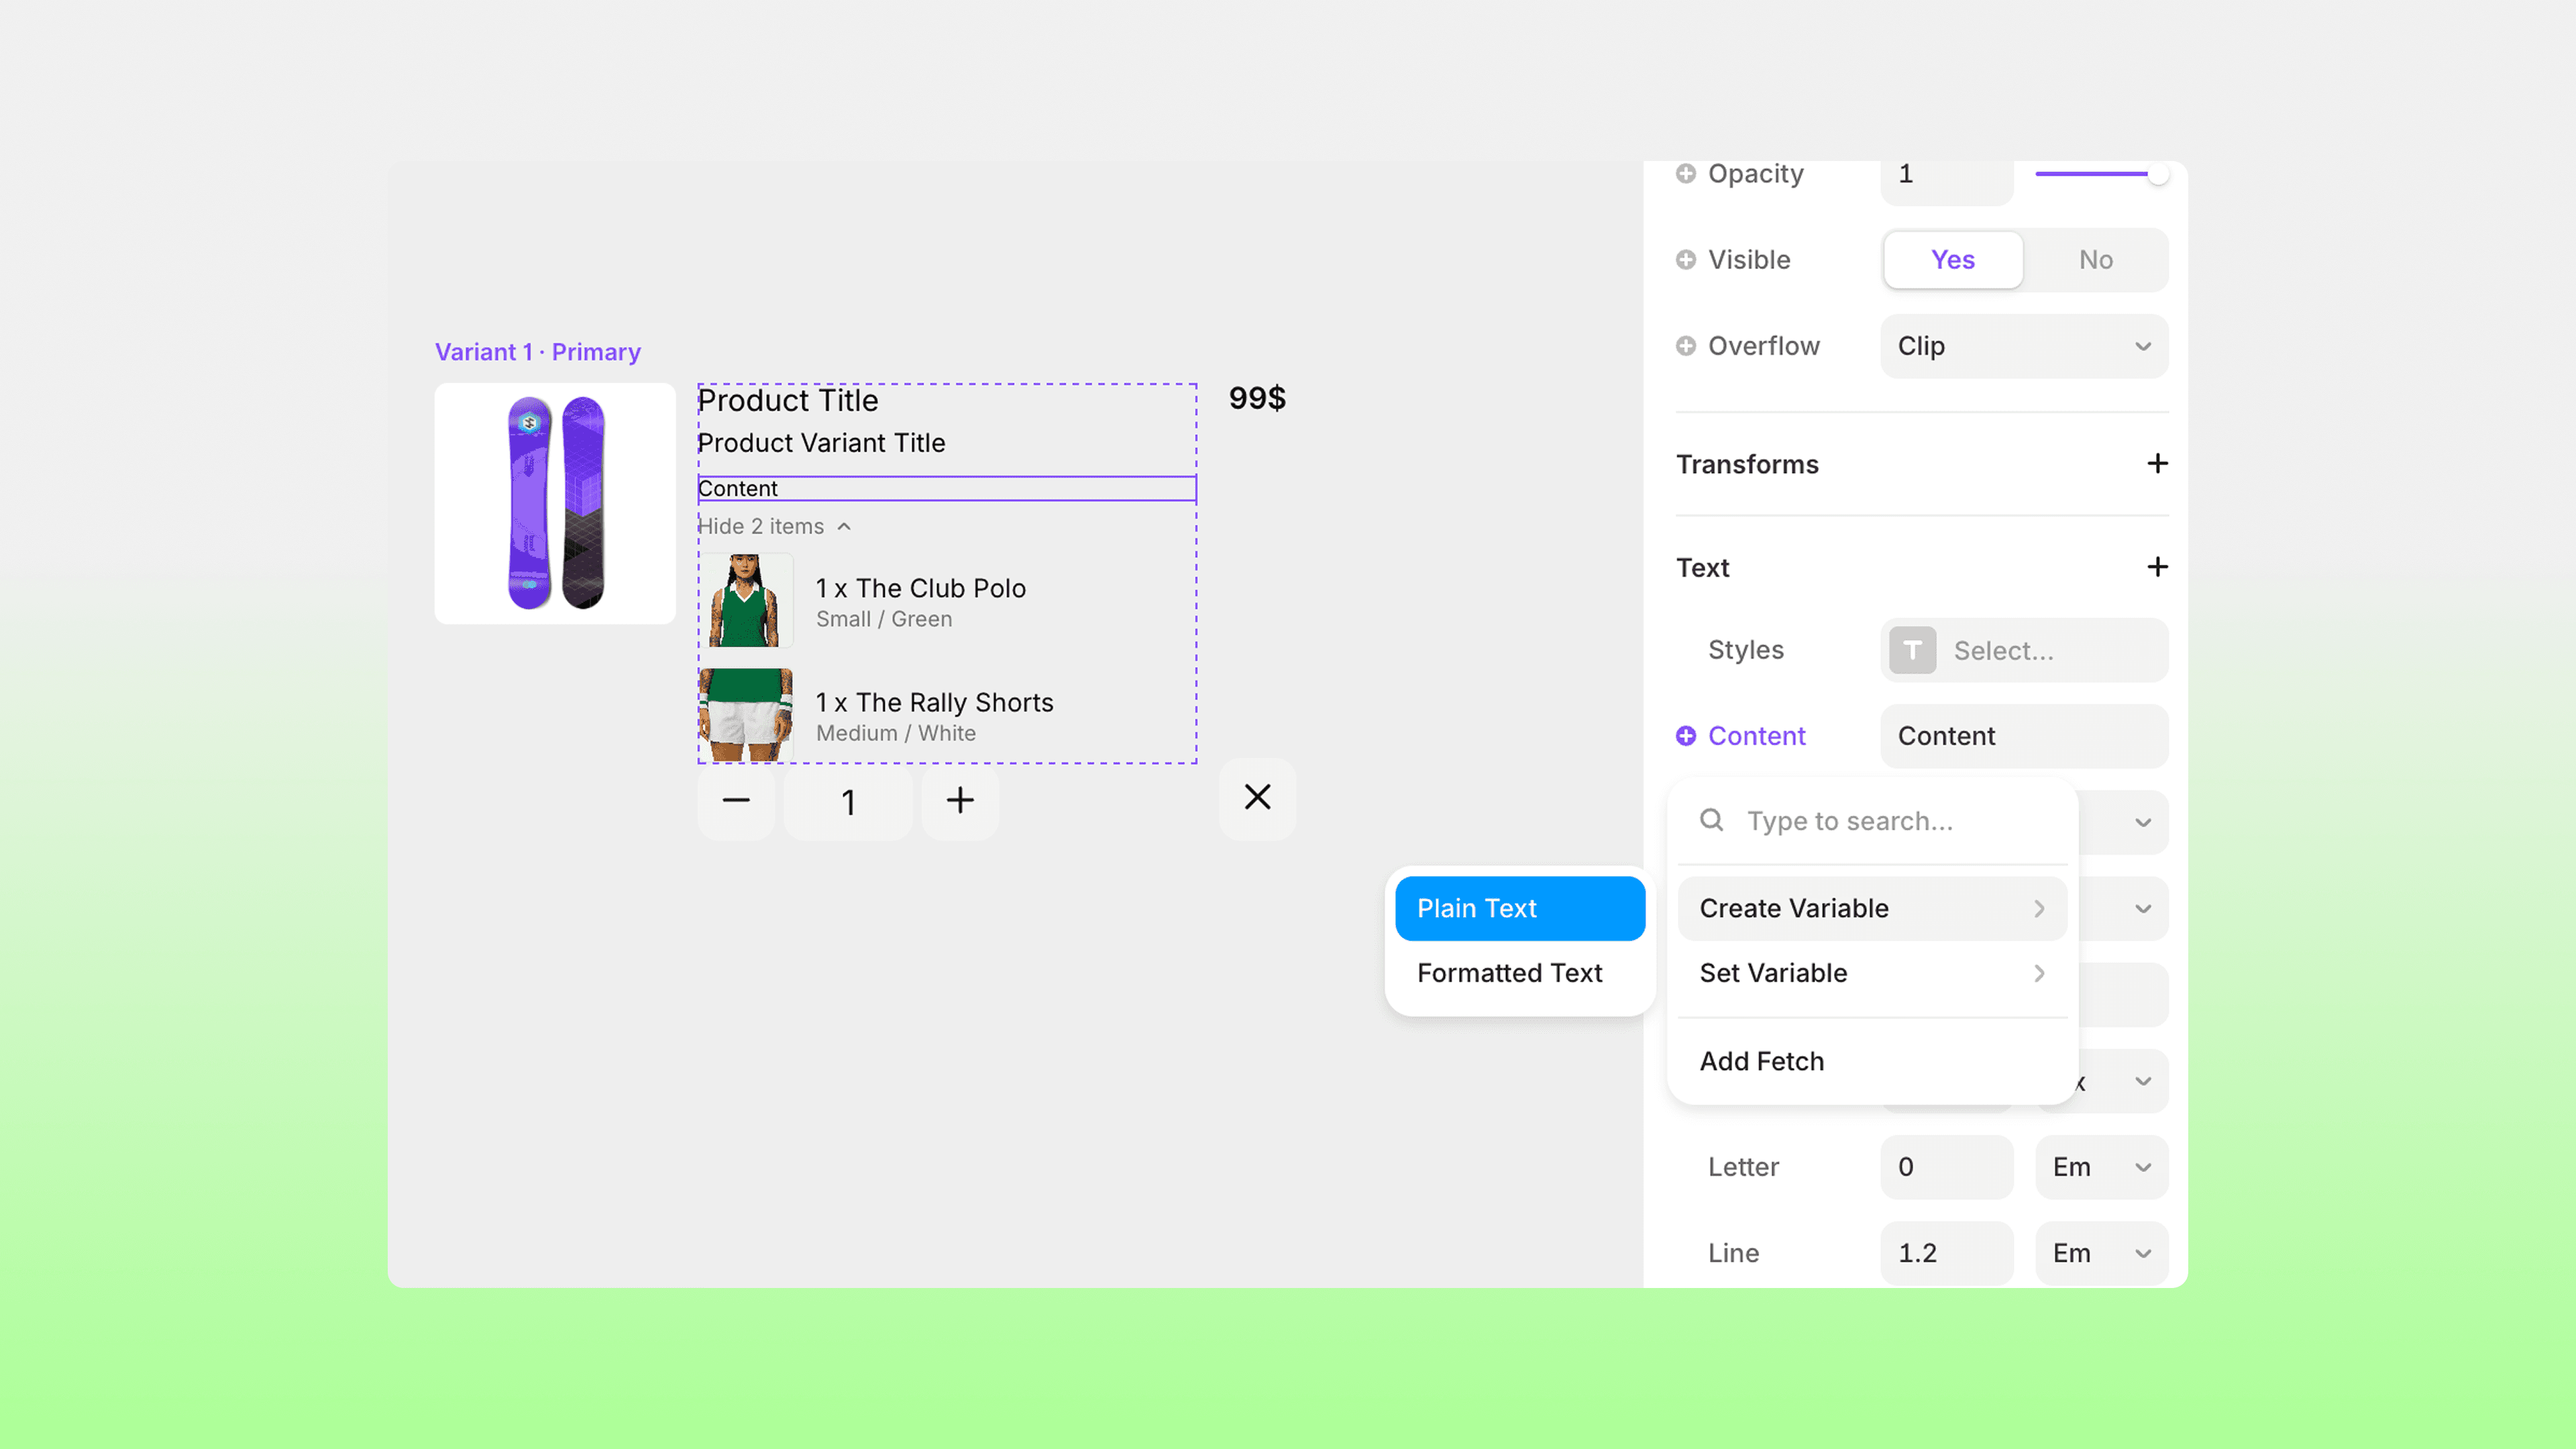
Once set up, the personalization input will appear in the cart, allowing customers to review the information that will be included in their order.
And you’re done! That’s how you can set up personalization field in Frameship.
RELATED DOCUMENTATION